
Making a Tenon Saw – Part 1
Note: See here for the introduction to this series.
You can’t make a saw without materials, and there are several options available depending upon your budget, how much work you want to do, and your willingness to order supplies online and pay shipping. Today, I’m going to be working on the saw blades, so I’m going to focus on the materials for the blades. I’ll talk about materials for the other components of the saw as I work on those parts.
For my new saw blades I use 1095 spring steel. This spring steel is the standard for today’s saw makers. If you buy a premium saw from pretty much any of the current boutique tool makers, it is almost a guarantee that the blade will be made from 1095 spring steel. If you buy a pre-cut and pre-punched saw blade from someone like TGIAG Toolworks or Blackburn Tools, you will get a blade of 1095 spring steel. If you want to make a really good saw, you can’t go wrong with this steel. I buy mine in rolls from McMaster Carr. This allows me to cut it to whatever length I like and I can get multiple saw blades for about the same price as a pre-cut blade. If you just want to make a single saw, buying a pre-cut piece of steel from one of the links above is a good way to go. They typically remove the blue color for you as well.
If you just want to try your hand at making a small saw (like a dovetail saw), another source for spring steel is drywall taping knives. You want the blue knives, not the stainless steel ones. The benefit to using drywall knives for steel is that they are cheap and available just about everywhere. The down side is that the steel is not 1095 but a lower quality spring steel. So the steel will be easier to cut and file and sharpen than 1095, but it will not stay sharp as long.
Finally, you can cut up old saws for steel as well. I have cut down long saws that had damaged toes to make smaller panel saws. You can also use the steel to make backsaws, but you will need to be careful about the thickness. Most long, unbacked saws use a significantly thicker steel than backsaws. So if you decide to use the steel from an old saw to make a backsaw, you will need to account for the additional thickness when you order or make the back.

I’m using 0.025″ thick 1095 spring steel. This is the typical thickness for a 12-18″ long tenon style saw. If you want to build a dovetail or carcass saw (typically 8-12″ long), the typical thickness is 0.020″. For larger, unbacked saws, like panel saws and long crosscut saws (20″ and longer), you want about 0.032″ thick. Rip saws are typically about 0.040″ thick.
After cutting the steel to rough length, I remove the blue color from it. You can do this by sanding the blade with finer and finer sandpaper, but it takes forever to do so, and the results are not as good as chemically removing it. The fastest way to remove the blue is to use muriatic (hydrochloric) acid. You can find this in the hardware store. It is sold for cleaning and etching concrete. You can also find it in several toilet bowl cleaners if you don’t want to buy a gallon. The bowl cleaner will likely smell nicer as well.
If you go this route, you will need to take some precautions. This is a very strong acid that can cause severe chemical burns if it contacts your skin. Good quality nitrile gloves are a must. Also keep some water close by to quickly rinse off any skin that accidentally comes in contact with the acid. It should also go without saying to wear eye protection to keep any accidental splashes out of your eyes. Finally, make sure you are in a well ventilated area, or better yet, just do it outside. The fumes from this stuff are very potent and will burn your nasal passages and throat if you breathe them in.
OK, with the safety patrol lecture over, we can continue. I prepare my area ahead of time because I don’t want to touch anything with acid on my gloves. I protect the work surface, I keep a soaking wet rag nearby, and a can of WD-40 with its own rag. With the area prepared, I don my gloves and work quickly. I pour a small amount of acid on a rag and quickly wipe it over the surface of the saw blade. The blue color will disappear instantly.
As soon as the blue is gone, I use the water soaked rag to dilute and remove the acid left on the surface of the steel. After a few wipes with the dripping wet rag, I immediately dry the steel off with another rag, and then immediately wipe on a film of oil or WD-40. If you don’t oil the steel, it will begin to rust almost instantly. Even if you do oil it right away, you still may need to use a bit of steel wool and more oil to remove some small areas of surface rust after a few minutes. Once the blades are cleaned and oiled, I hold the acid rag in my gloved hand and remove the gloves by pulling them around the acid rag. This will contain the small amount of acid in the rag and allow you to dispose of it in the trash without damaging anything.
After cleaning up my work area, I mark out the blades for cutting to size with a fine point Sharpie. I’m making 4 different sized saws, but the most useful size that I have found is a 14″ sash saw. I make my saws with canted, or tapered, blades. If you prefer a more American style saw, you can make the blade without the taper. The dimensions I’m using for the two sash saws I’m making are 4-3/8″ at the heel and 3-1/2″ at the toe. The cutting depth will be slightly less than this once the back is installed.
I make the top side of the saw blade (the side where the back will be installed) square to the toe and heel, and taper the toothline (the opposite of how long had saws are tapered). However, some historical drawings and images would suggest that the toothline is square to the toe and heel while the back side is tapered (the same as how long saws are tapered). I think the way I do it looks better aesthetically for a backsaw, but the choice is yours.
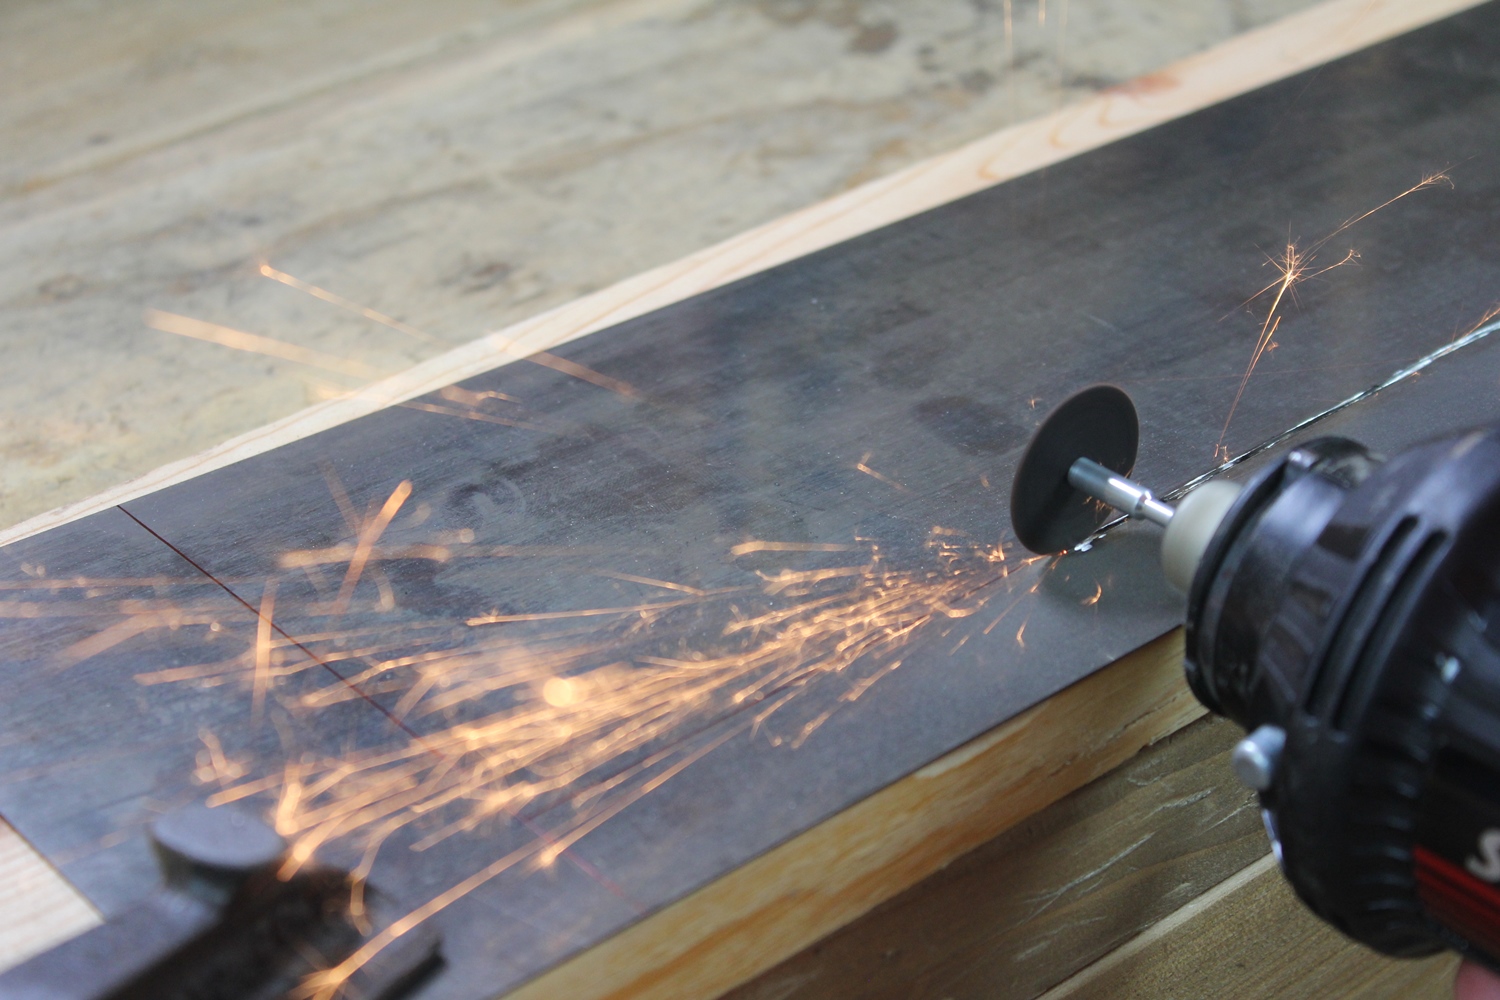
You can cut the steel in several ways. When I built my very first saw, I took the corner of a file and scored the cut line numerous times before I bent and snapped the waste piece off. This worked for thinner blades, but it didn’t work well. It really didn’t work at all for thicker blades. If it does work, it leaves a lot of deformed steel at the cut that then needs to be filed away. I have also used metal aviation snips. Again, this works, but leaves a good bit of deformed steel at the cut edge that has to be filed away, and the hardened saw steel dulls the snips very quickly.
The method I’ve settled on is using an abrasive cutting wheel in a rotary tool. A cutting wheel in an angle grinder will work too. You need to have some patience and a steady hand definitely helps minimize filing, but I find that this method is fast enough and accurate enough, and it does not deform the steel at all. You might think that the heat generated from the cutting wheel would draw the temper from the steel, but I have not found this to be the case. Enough filing is required after cutting to straighten the edge that any softened steel is pretty much filed away. If you are concerned about damaging the toothline with the cutting wheel, just cut the back side and leave the factory edge for the toothline.

After cutting the blade to shape and size, the cut edges are filed to remove the metal shards and straighten the cut edge. I use my saw filing vise for this as it is the perfect tool for the job. You need to make sure your file is sharp when you do this. If the file is dull and skates across the steel, it can go from cutting to slipping very quickly. If it slips, the cut edge of the saw blade can and will slice you open like a filleted fish. Wearing leather gloves while completing this step would not be a bad idea. Don’t ask me how I know this.

This is where I stop with the blades for now. There’s no point in doing any polishing at this point because the blades are bound to get scratched up between now and when the saws are done. I also don’t want to drill any holes yet. I’ll use the handles to mark the locations of the holes when I make them (the two with the teeth and existing holes are saws that are being remade). I did put the brass back blanks on them just to see how the overall shape looks. I’m satisfied, so the next step is to make the backs.

7 Comments
Would leaving the bluing on the steel harm the performance of the saw? I am sure that with lots of use it would probably wear and not win any beauty contests. Looking forward to this series.
Nope, it won’t hurt the performance at all. It’s just an aesthetic thing. A lot of the saws in Williamsburg still have their blue coating. It may wear in time, but I don’t think it will wear a lot.
How do you go from the roll of steel to the rather perfectly flat looking pieces you’re working with here?
It’s spring steel. When you cut the band off the roll, it will uncoil and flatten itself. But be careful. It will spring right in your face if you’re not. I typically cut the band off while the roll is still in the box to contain it. Then once the band is cut off, I can control the unraveling of the roll.
Muriatic acid is a bit too strong, toxic and corrosive for this purpose. Never open a bottle in your shop or you’ll find your prized tools rusted by its vapors. Instead, I suggest soaking the steel in a milder acid such as lemon juice or vinegar for about a minute and rinsing it off. It is equally effective and more easily obtainable.
Thanks for the suggestion. However, I’ve been building saws for about 15 years and I can confidently confirm that neither vinegar nor lemon juice will easily or quickly remove the bluing from the steel. Perhaps an overnight soak (which I’ve done), but a minute is not long enough to be effective. A stronger acid or mechanical removal is required for faster results.
Muriatic acid is neither too strong nor too toxic if proper precautions are taken and proper ventilation is employed. As a chemist by degree and occupation, I’m well aware of the dangers of muriatic acid and I am comfortable working with it. Hence the warnings I included in the post. I fully realize that not everyone will be comfortable using the method that I do, however, if one uses the proper precautions and safety measures, and the method I detailed in the post, it is a perfectly safe and effective way to get the job done quickly.
However, as stated in the post, if anyone is not comfortable using this method, there are alternative methods that pose less risk but just don’t work as quickly.
I couldn’t find this type of steel from India, thanks a lot 👍👍