
Making Kitchen Cabinets – The Box
Note: Click here for all the posts in this build series.
Shopping for new kitchen cabinets as a woodworker kind of makes you vomit in your mouth a little (you do too, don’t you…is it just me?). Half inch thick, vinyl veneered particle board is pretty standard. If the cabinets are painted, it’s usually MDF. The manufacturer pretty much uses the absolute cheapest material that they can get away with, joins those flimsy panels with hot melt glue and staples, and then staples a few plastic triangles in the corners and a vinyl veneered piece of cardboard on the back. Then they have the nerve to charge $500 or more apiece for that pile of crap.
When we decided to build our own cabinets, I knew that we could not only save money (we did), but we could also end up with a much higher quality item (which we also did). The thing is, it doesn’t take fancy joinery or elaborate construction methods to build a high quality cabinet box. If you’re adding face frames to the box, then the box construction is even simpler because you don’t have to worry about exposed edges.

I start with a quality sheet of cabinet grade hardwood veneered plywood. Plywood is a better cabinet box material than particle board or MDF for oh so many reasons. In my opinion, it’s the only other acceptable option if you can’t use solid wood. I prefer 3/4″ thick plywood for my cabinet boxes because it’s more substantial than 1/2″ and provides more meat for holding screws. But for smaller cabinets, and certainly for wall cabinets, you can get away with using 1/2″ thick.
The plywood I’m using is a maple plywood from the home center. It’s a North American made panel (PureBond from Columbia Forest Products), and it’s much better than the termite barf used in retail cabinets. There are a few small voids here and there. However, in general it’s a good quality panel for cabinet boxes at about $50 for a 4′ x 8′ sheet (at least that’s what it was when I bought it).
I find that the home center hardwood plywood sometimes gets a bad reputation as crap material. While I wouldn’t use this plywood as a stain grade appearance panel, because it has a rotary cut veneer, it makes a fine paint grade panel. Some home centers do carry lower quality plywood, so do your research before you go shopping. Once you get to the home center, inspect the panels in the stack, be picky, and you can get nice, flat panels, even from the home center.

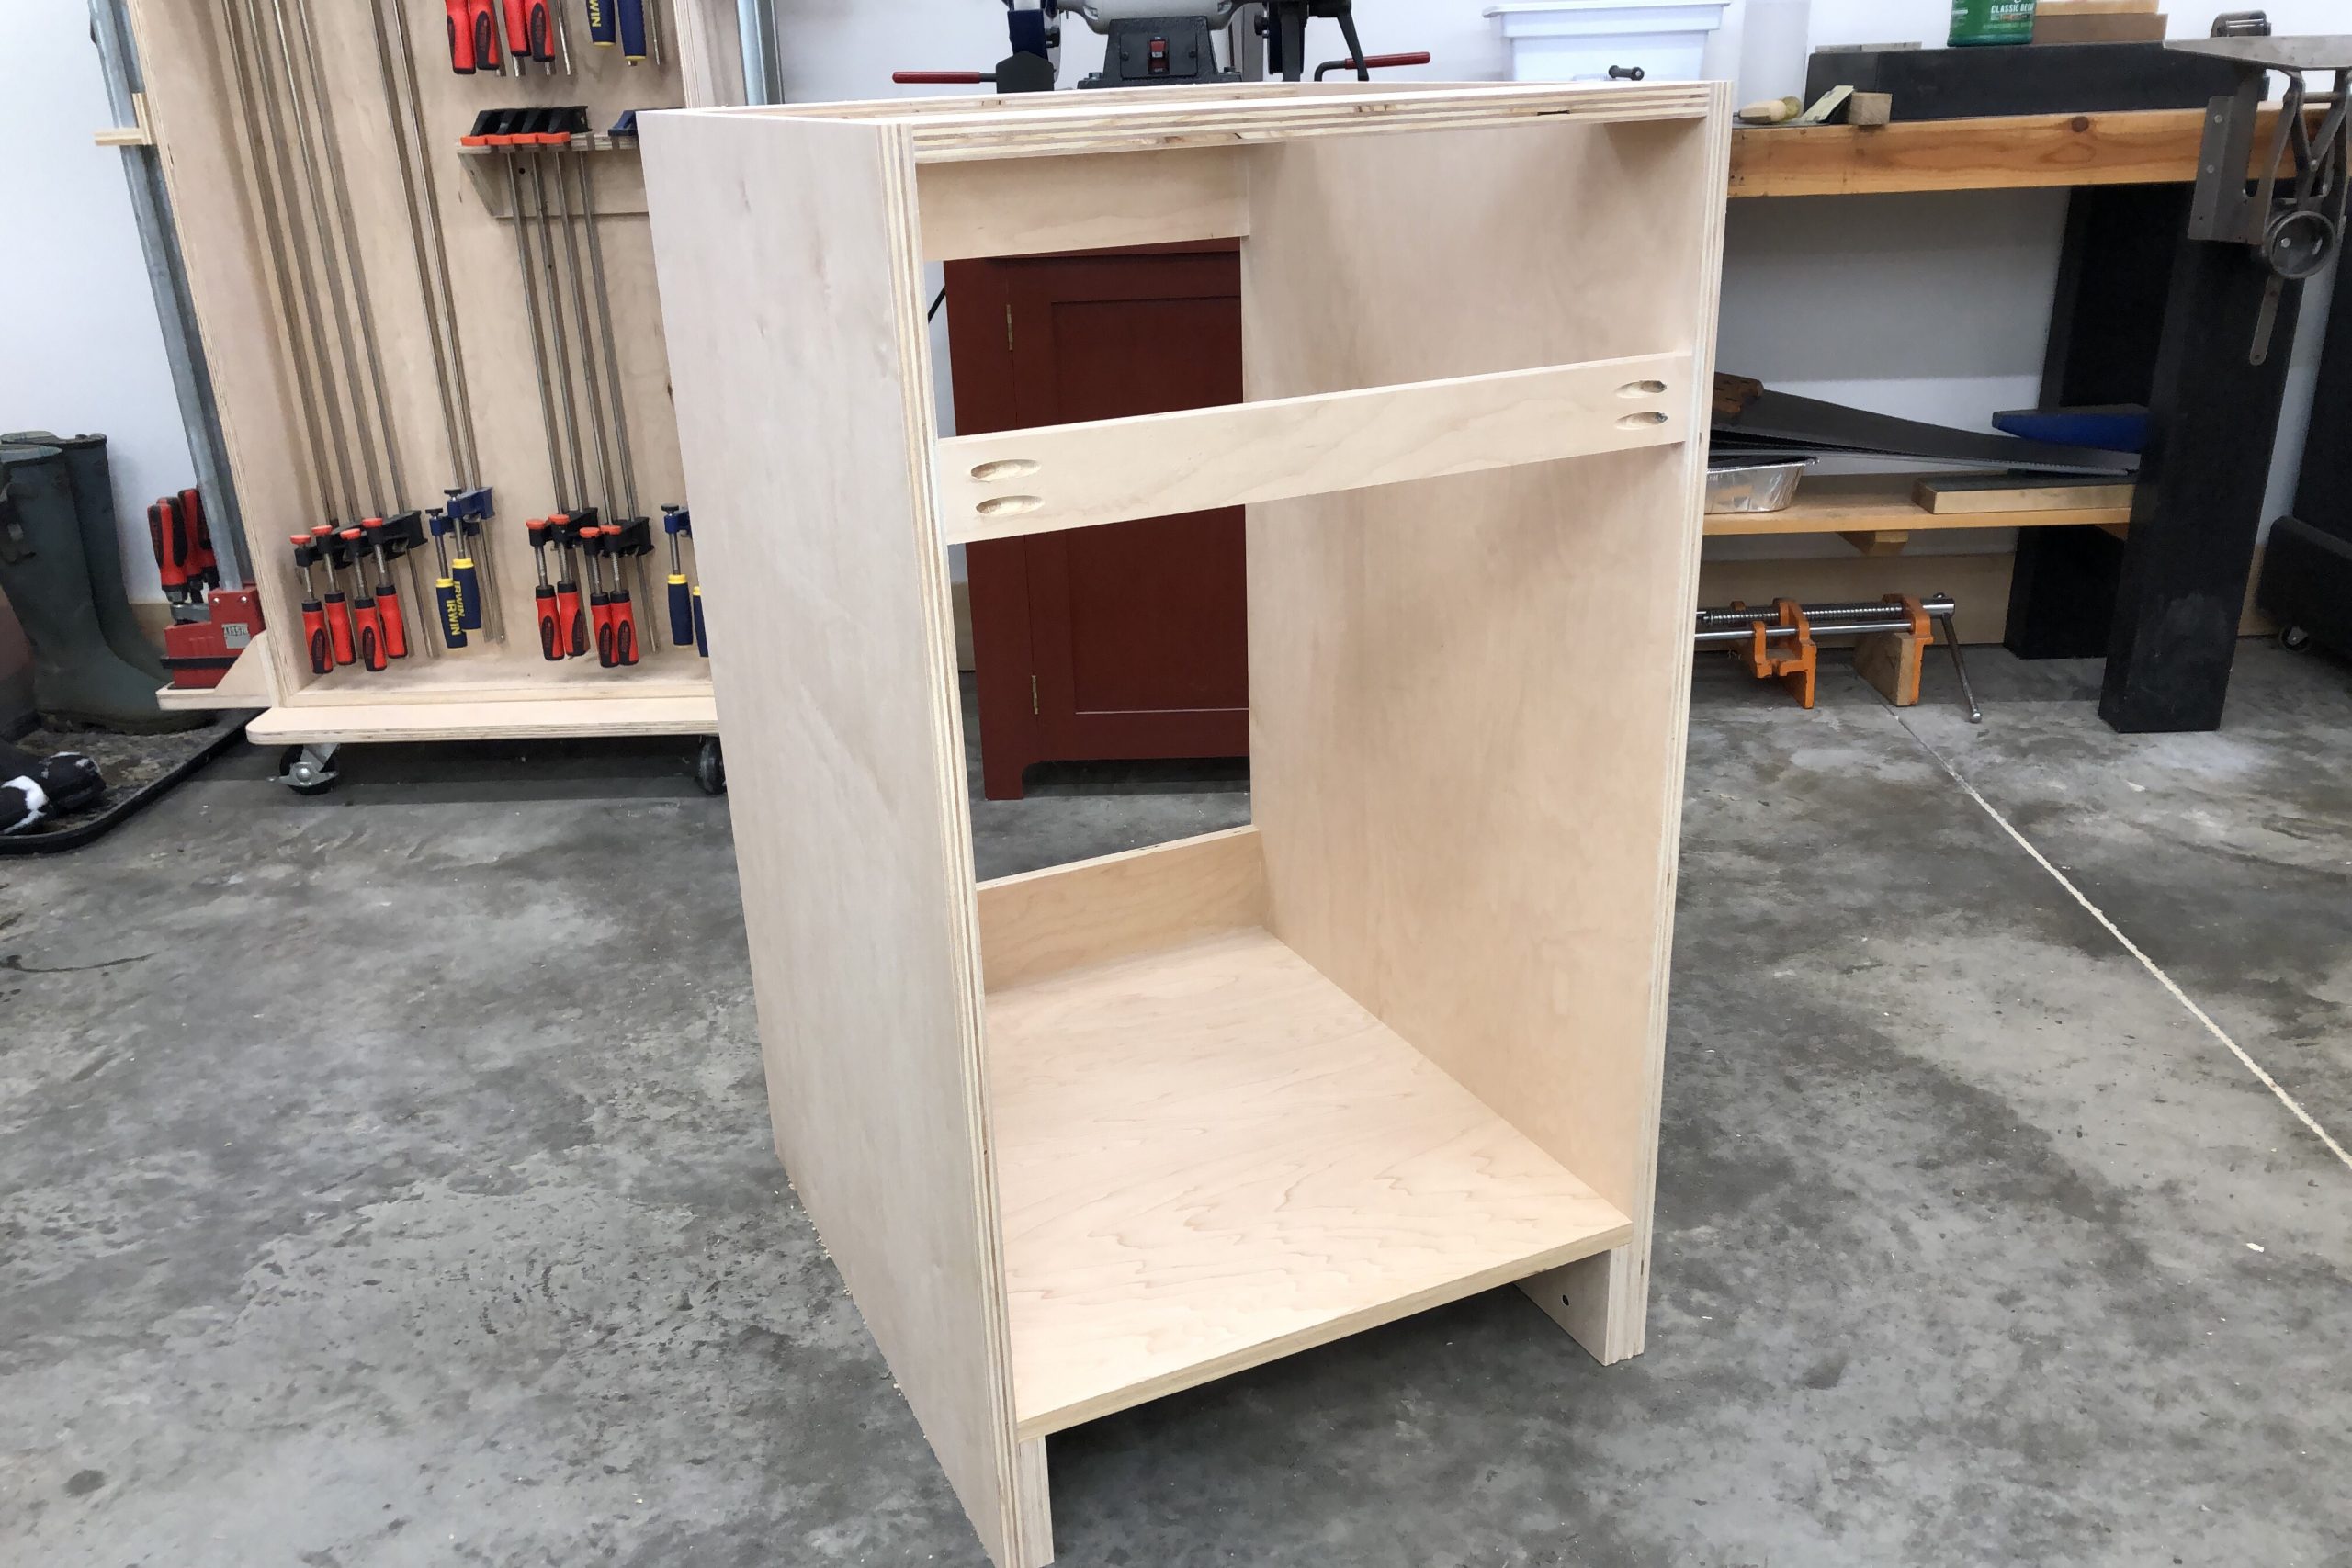
Using my drawing, I cut all of the parts to size. I gang cut and use stop blocks as much as possible to ensure that parts which need to be identical are in fact identical. Just like when I use hand tools, I’m not so concerned if the measurement is dead on. For example, the stack of four 4″ wide plywood support pieces and the 2″ wide drawer divider above should all have been 18 1/2″ according to my drawing. However, they ended up about 1/32″ short. But that’s not a big deal because all of those parts, and the bottom shelf of the cabinet, were cut using the same setup. So they’re all 1/32″ short of 18 1/2″, but they’re all dead nuts identical in length. This will help to ensure that the cabinet box ends up going together square, even if it’s 1/32″ narrower than originally intended.

To join the cabinet bottom to the sides, I could have cut a dado in the cabinet sides, but there’s no need in this case. The joint isn’t going to be seen in the finished piece (the front will be covered by a face frame), and once the cabinet is installed, it won’t be moved around like a piece of furniture so there won’t be any stress at all on the connection between the sides and bottom. So instead of a dado, I glue and screw a 4″ tall cleat (an offcut from crosscutting the cabinet sides to length so it’s the same width as the sides) to the inside face of the sides. This is much faster than making a dado and provides a full 3/4″ of support at the ends of the cabinet bottom. A couple of 18 ga. brads hold things in place while I drive the screws.

The cabinet bottom is then attached to the box sides using glue and screws. If the side of the cabinet will be visible after the cabinet is installed, I put the screws in from underneath, using pocket holes, so that they won’t show on the sides of the cabinet box. A little glue and some clamps are used to make sure everything is nice and snug and that there are no gaps before the screws are driven. If, on the other hand, the side of the cabinet will not be seen after installation, then I’ll just drill pilot holes and put the screws in right through the side of the cabinet.

This method of installing the cabinet bottom is surprisingly rigid and sturdy and I can easily stand inside the cabinet with no fear of it coming apart. However, there is still a lot of movement at the top of the box, and that is where the remaining pieces come in. These are all added to make the box square and rigid, and for attaching these pieces, it’s hard to beat glue and pocket hole screws.

Pocket hole screws are not new technology by any stretch of the imagination. I’ve seen pocket hole screws used in furniture made as far back as the early 1700’s. Today, however, pocket hole screws have a reputation of being a cheap, inferior method of construction due to so many DIY shows and YouTube channels using them for structural joinery that they were never intended to be used for. Using pocket hole screws to hold the parts of a chair together is probably not going to end well in the long run. However, when used in appropriate situations, pocket hole screws can be extremely useful, and save a lot of time.

This is one of those applications. Each of the support pieces that gets added between the cabinet sides helps to keep the sides of the cabinet from bowing in. The pocket hole screws are used as clamps until the glue dries, and maybe add a little extra reinforcement to keep the sides from bowing out. However, they really only need to hold the cabinet sides together until the glue dries and the face frame is added. Once the glue dries and the face frame is glued to the front of the box, the screws serve very little purpose.
At this point, the cabinet box is done. Building this box took me about two hours or so, and that’s because I had to set up all of the machines and stop to set up and take pictures. When I built the other base cabinets that are currently installed in the kitchen, I built all of the boxes in about two days of work, and that’s only because I didn’t have the room to assemble them all in one day. If I had the space, I could have finished all of the boxes for all of the base cabinets in a single day, because once the machines are set up, you can just run all the parts for that setup.
Next up, building the face frame.

3 Comments
Hi! I’m following this with great interest, as I’m also planning of making my own kitchen. One question which has been bothering me for a while now, and I can’t seem to get a good answer from any source. How do I cut and square plywood sheets and what tolerances do I need? Do you use a track saw, only the table saw or some other method? I’ve used plywood in a very small amount so far, just for some rough stuff, and up until now I haven’t had to think too much about this. But when constructing my kitchen this becomes an issue for me. So all help regarding this would be helpful.
I only use the table saw to cut the plywood panels. I first rip the sheet in half (24″) using the factory edge against the fence. The factory edge is decent enough to make sure the cut is straight. Then I flip the piece over and run it through again, putting the clean cut edge against the fence and cutting the factory edge off at 23-1/4″ wide. This is the width of the base cabinet sides.
Then I crosscut the pieces to length (34-1/2″) using a homemade panel sled on the table saw. It’s pretty quick work with a contractor saw (what I have) or cabinet saw when you have an outfeed table. I wouldn’t try it with a job site saw. If I didn’t have at least a contractor saw, I wouldn’t be building the cabinets myself. Just not worth it to me. In fact, the only reason I even have the table saw is for these cabinets. If you’re going to build an entire kitchen worth of cabinets, it’s worth it to get at least a decent contractor saw, even if you end up selling it later. It pays for itself if you’re building a full kitchen of cabinets.
Thank you so much for the reply and good advise. I upgraded (in my point of view…) my small cabinet saw to an old and trustworthy Wadkin for just this purpose, so hope that I’ll manage this task with that saw.