
Sharpening Center Bits
Note: I have several articles on sharpening different types of bits for a hand brace. While I cover sharpening center bits in this article, I also have articles on sharpening spiral auger bits and gimlet bits as well.
I love using well tuned center bits. They might be the most underrated of the bits designed for use in a hand brace. Like modern Forstner bits, they were traditionally available in 1/16″ increments, from a tiny 3/16″ diameter, up to over 2″ in diameter.

The cutting geometry of center bits is similar to spiral augers. One side of the bit has a scoring spur that defines the diameter of the hole. The other side has a cutting lip that removes the chips. Unlike spiral augers, however, there is a center point rather than a lead screw. This center point is triangular in cross section, so the corners actually bore a pilot hole as the bit advances, unlike a lead screw, which merely wedges its way through. As a result, a center bit can be used near the edge of a board without the risk of splitting the piece, whereas the lead screw of a spiral auger will cause the board to split if the bit is used too close to the edge.
Also, because there is no lead screw dictating the feed rate, a very large center bit can be used with a brace having a much smaller throw than a similar sized spiral auger. If you’ve ever tried to use a 1″ spiral auger in hardwood with the typical 8-10″ sweep brace, you know that you need to eat your Wheaties first. However, I’ve used a 2″ center bit with my little wooden brace with little more effort than using a ¼” bit, since I dictate the rate of feed.
Unfortunately, a problem with these bits when you do find them is their typical, unusable condition. Fortunately, center bits are much easier to sharpen than your typical spiral auger. The first thing to address is the scoring spur. Using an auger bit file or a tapered saw sharpening file, sharpen the inside face of the spur . The cutting edge of the spur should be angled so that it slices like a marking knife. File the inside face until a burr is raised on the outside of the spur.
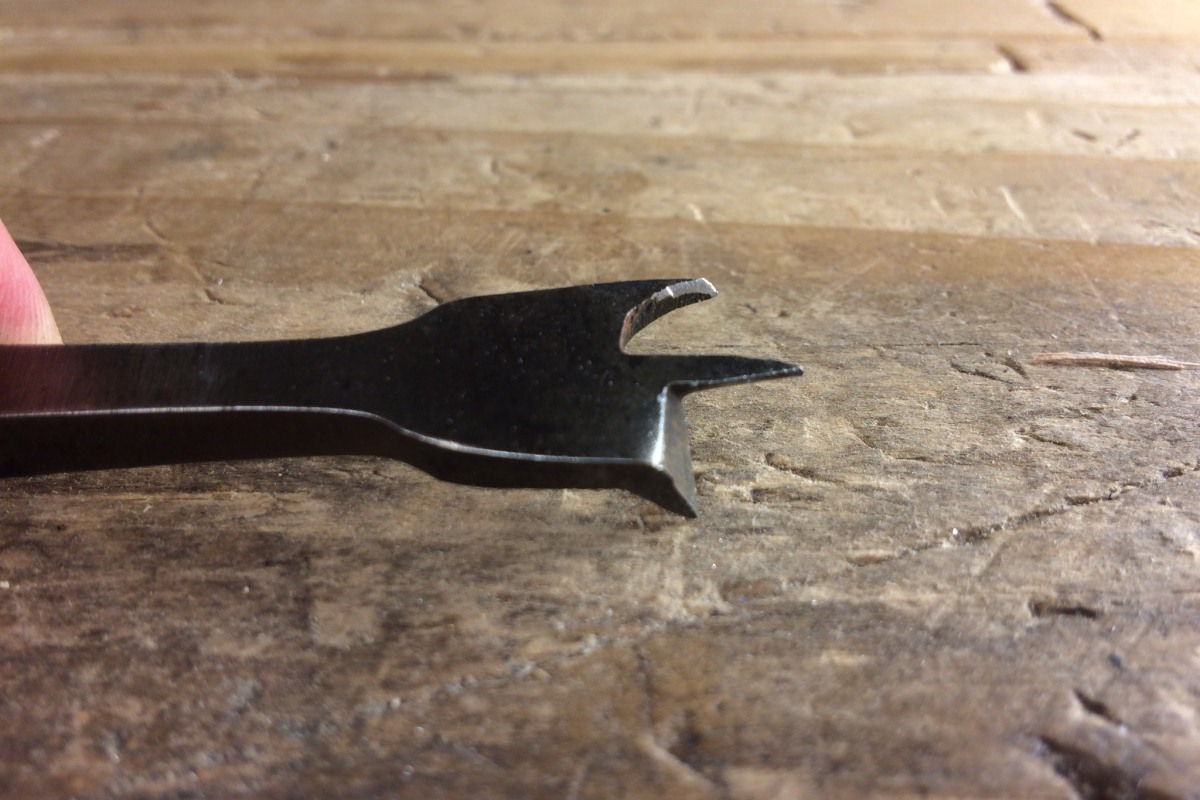
After you’ve raised a burr on the outside of the center bit’s scoring spur, you can strop or hone the burr off the outside of the spur with your finest stone. Don’t remove any steel from the outside of the spur or you’ll change the diameter of the bit. Just lightly work the burr off until the spur is really sharp.
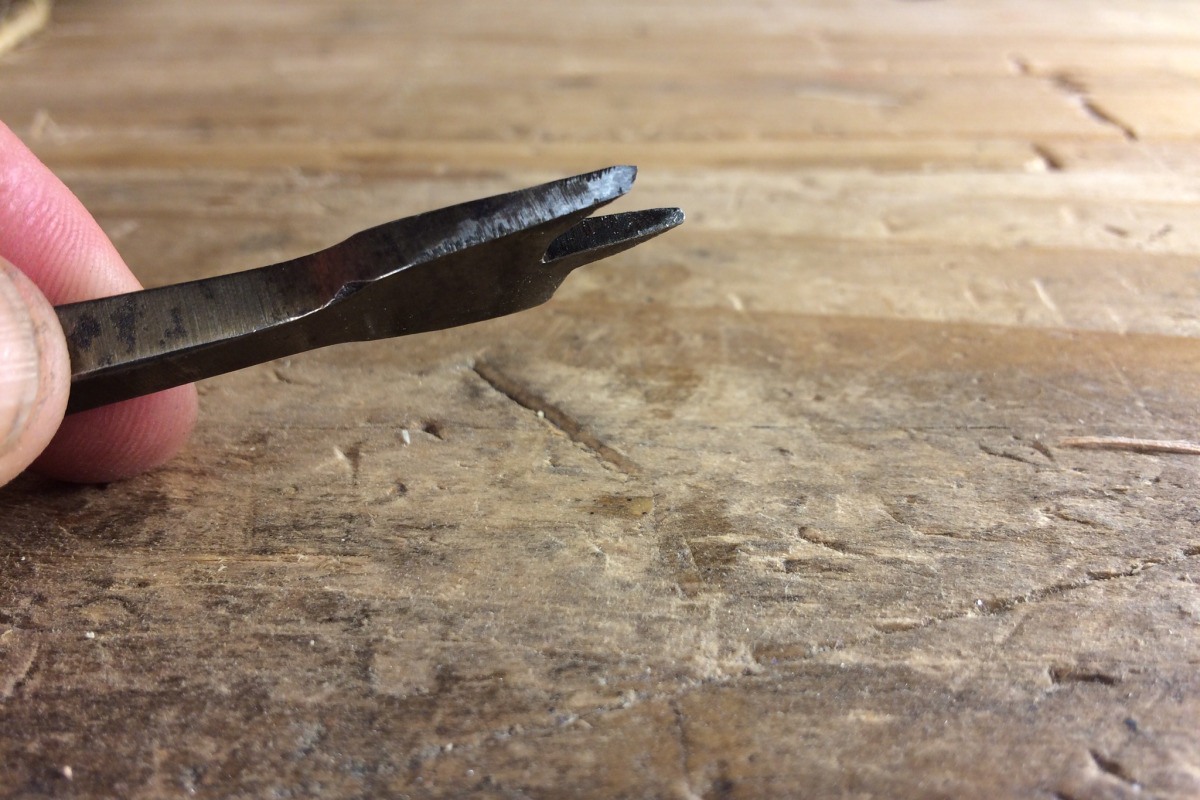
Next, work on the cutting lip. I start on the bottom edge. However, you need to be careful here. Like a hand plane, a sufficient clearance angle needs to be maintained behind the cutting edge. If you just file the very edge, you’ll reduce the clearance angle and the bit may not cut. So be sure to maintain the clearance angle by keeping the file flat on the bottom of the cutting lip and filing the entire lip. If you’re afraid you might ruin the clearance angle by filing the bottom of the cutting lip, skip this step. The bit will still get sharp in the next step, just not quite as keen.
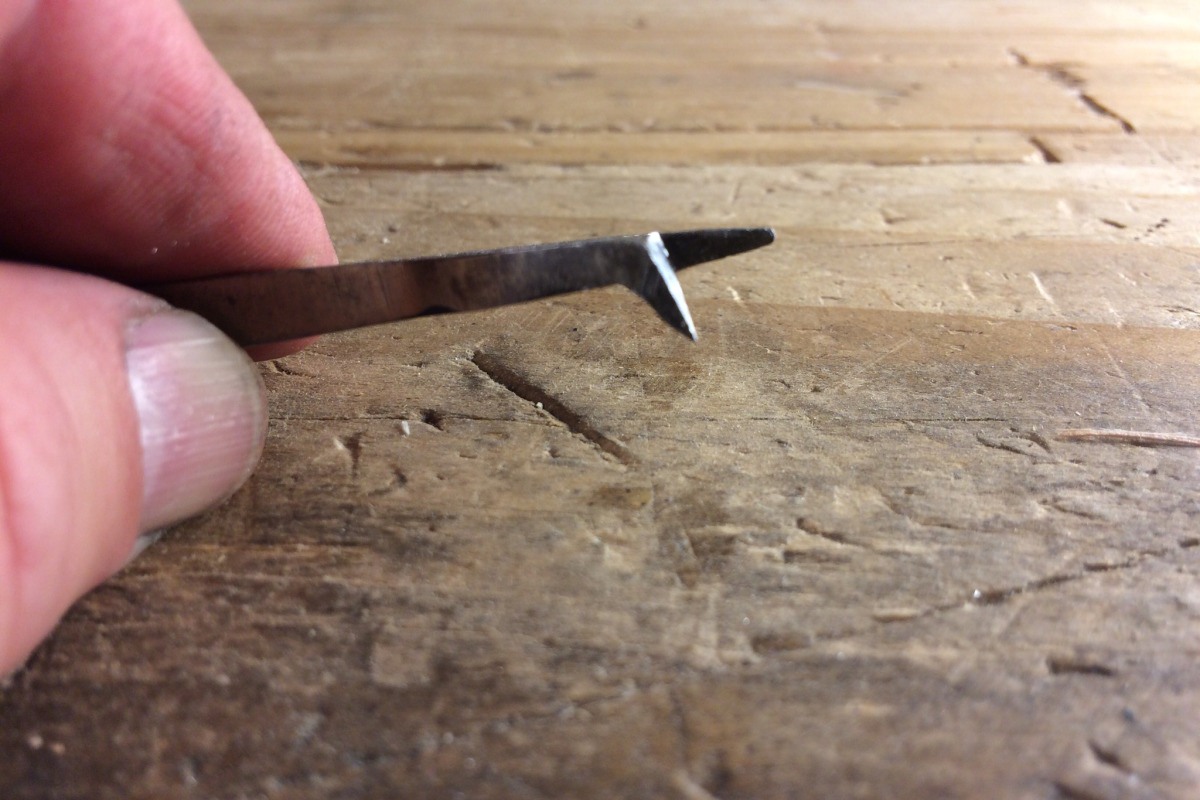
With the bottom of the cutting lip filed, move to the top of the cutting lip. The angle of this face is less important. Just file it lightly until the lip is sharp.
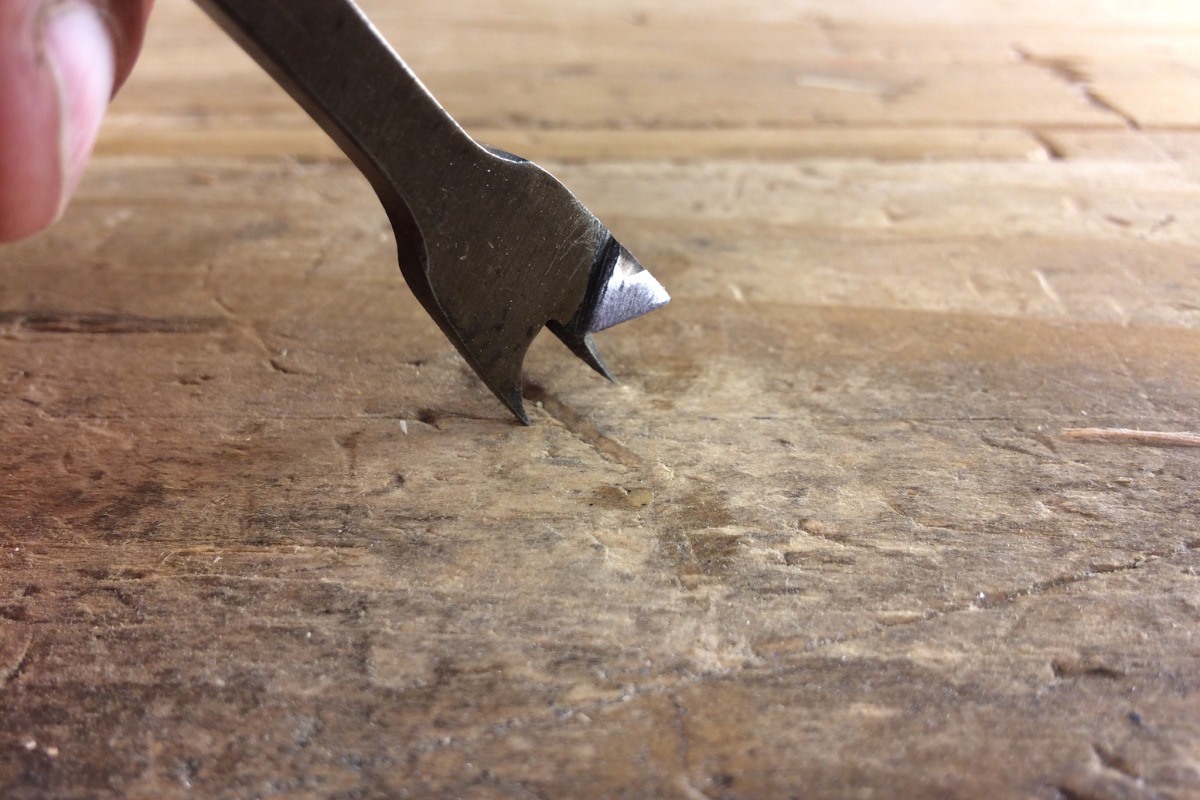
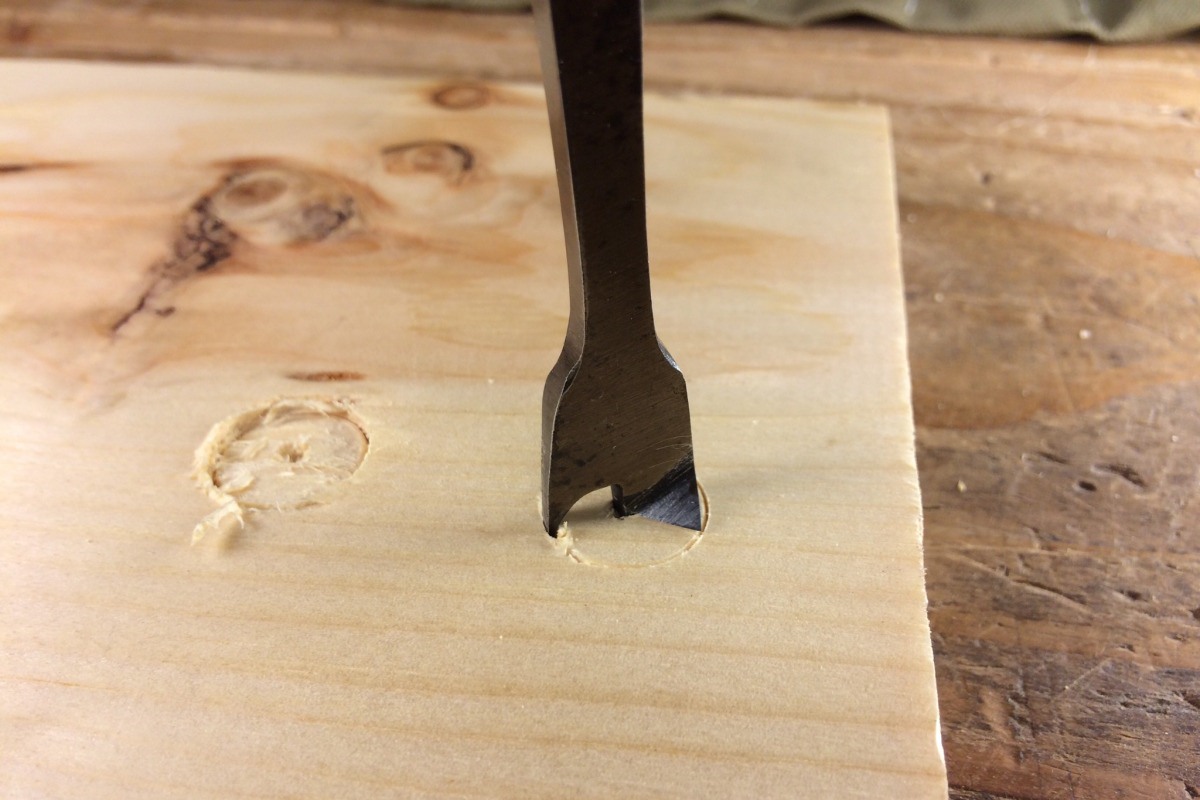
Now, before moving on to the center point, start a test hole with the bit. Bore until just before the cutting lip engages and observe the location of the point of the cutting lip. If the bit is sized properly and the point is centered, the point of the cutting lip should be a hair inside the scored circle. If the cutting lip is well inside of the scored circle, or outside of the scored circle like in the photo below, you have some additional work to do.
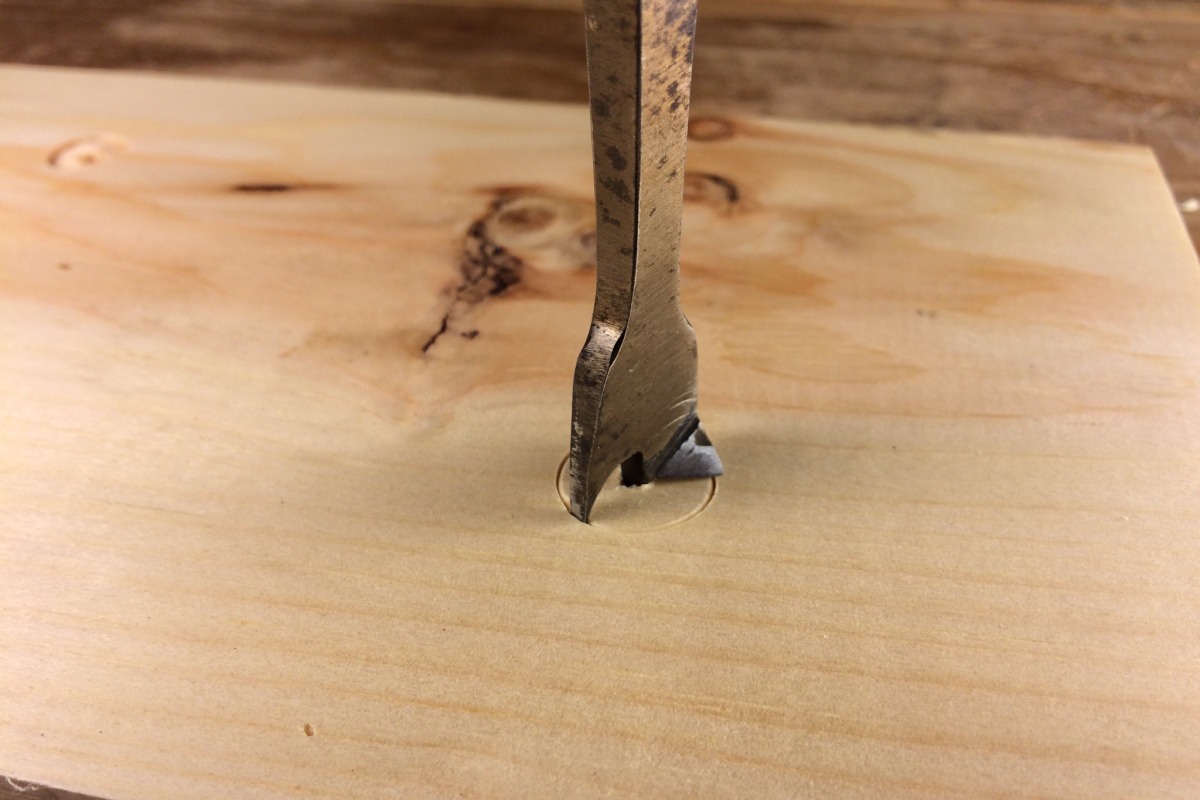
If you leave the bit as is, you won’t get a clean or fully excavated hole. In the case of a cutting point that lies outside of the scored hole (like the bit above), the lip will tear chips out and make a hole of the wrong size (see the photo below). In the case of a cutting point that lies well inside of the scored hole, the cutting lip won’t excavate the entire scored area and you’ll end up with a hole inside a hole and the bit will only cut for a short while before it jams in the hole.
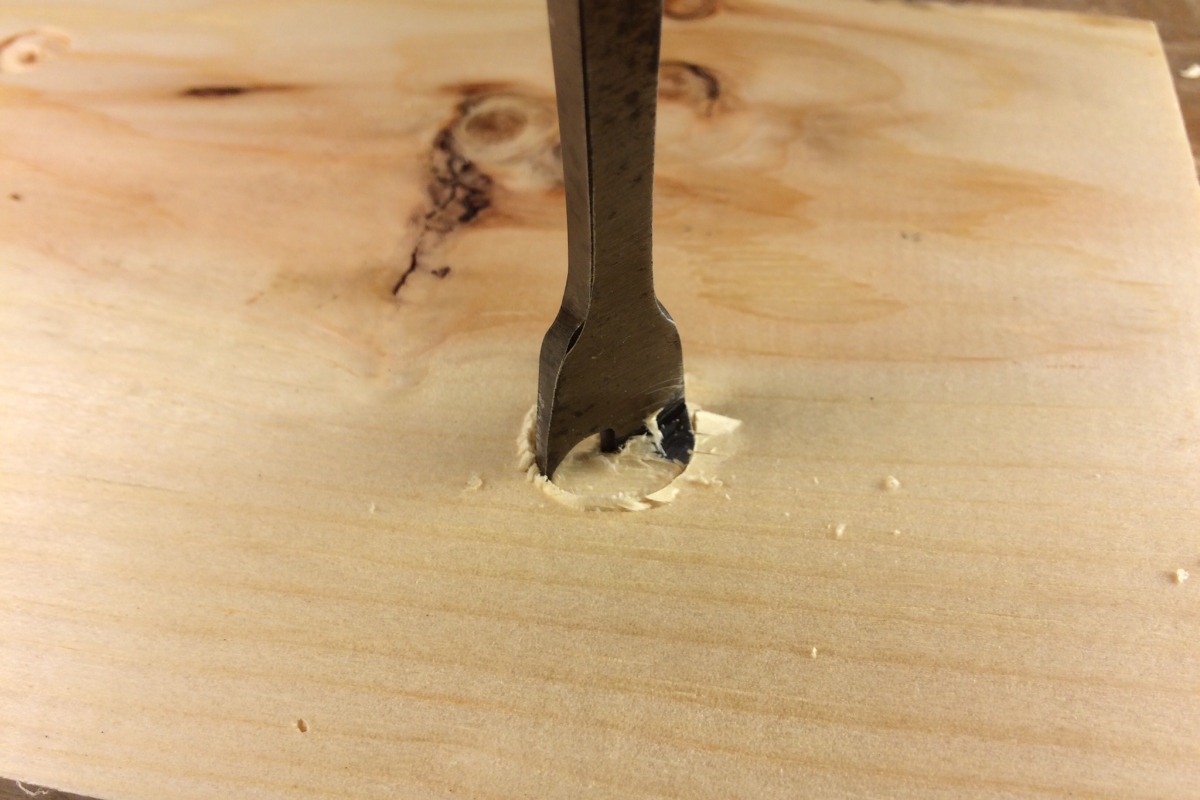
Regardless of whether the cutting lip is outside of the scored circle, or well inside of the scored circle, the solution is the same. Solving both problems starts with ensuring that the center point is the appropriate distance from the scoring spur. If it is, the scored circle will be the correct diameter. In the case of the ⅝” bit I’m working on here, the scored circle was a little under ⅝”, indicating that the point was slightly off center. To fix this, I file the side of the center point adjacent to the scoring spur in order to increase the radius of the scored circle slightly (if the diameter had been over ⅝”, I would file the side of the point adjacent to the cutting lip to reduce the radius of the scored hole). File the side of the center point, stopping and testing the bit frequently until the scored circle is the appropriate size, in my case, ⅝”.
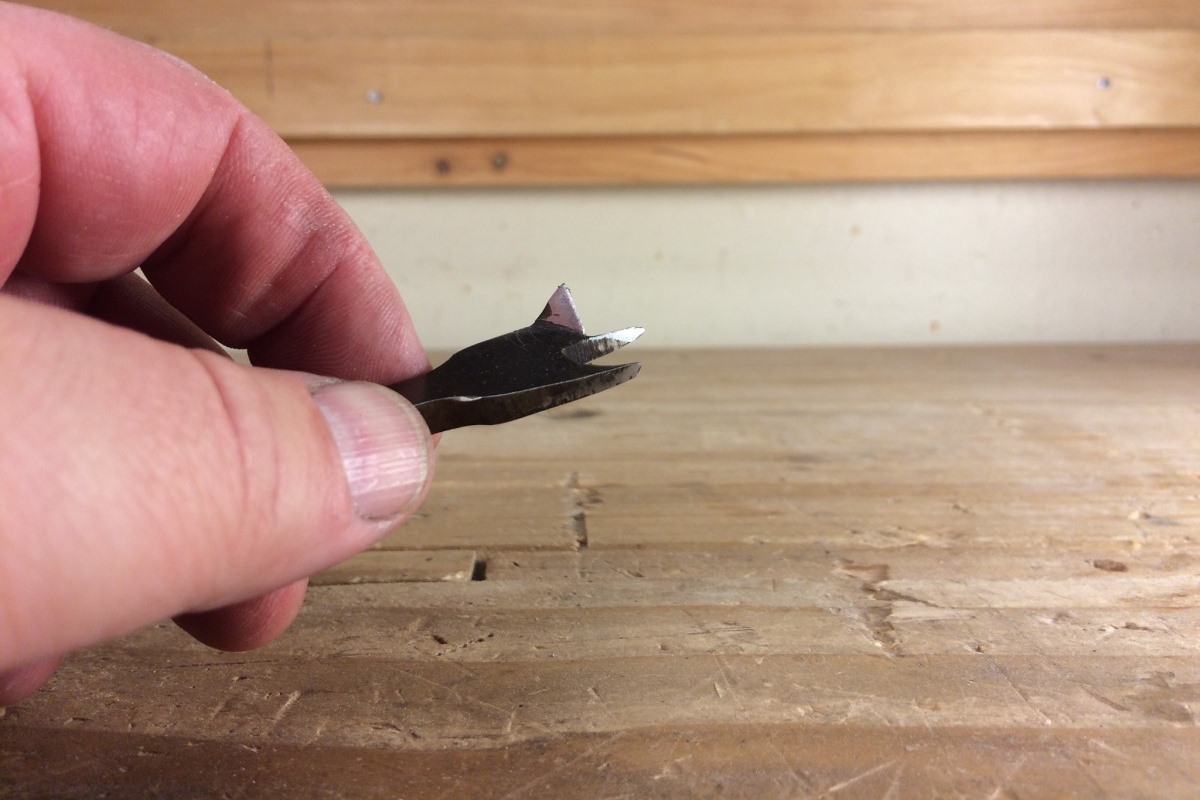
It is important to note here that if your bit was improperly filed on the outside of the spur, the overall size of the bit may have been reduced. If the overall width of the bit has been reduced, you’ll have to divide the width of the bit in half and work to that radius. In my case, once the scored circle was the appropriate ⅝” diameter, I checked the cutting lip again and it was still slightly outside of the scored circle, indicating that the bit itself was just a tad over ⅝” wide. Since the bit itself was slightly oversize, the side of the cutting lip needed adjusting as well. To do this I filed the side of the lip at the same angle that it was already ground at until the lip cut just a hair inside of the scored hole.
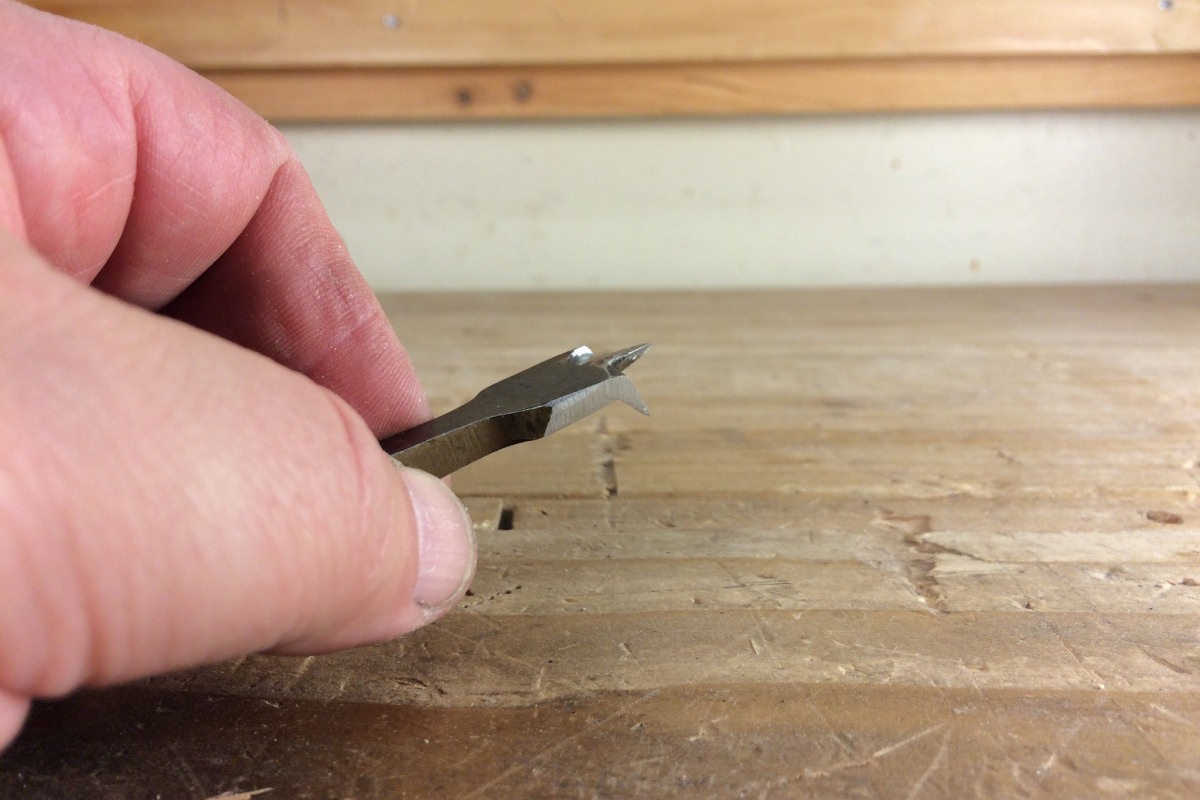
Once properly filed, the scoring spur should score a circle of the appropriate diameter, and the cutting lip should be cutting right up to the shoulder of the scored circle. The bit should then bore a clean hole with no chipping around the edge.
Tag:Boring Tools, Sharpening

3 Comments
Very nice and detailed article. I feel like now I can take on the lot of rusty and neglected vintage center bits I got from eBay. Some of them look way asymmetrical (I mean the distance from the centering spur to the scoring spur vs the cutting lip width).
P.S. I was a bit confused in this and related bit sharpening articles with the way you were referring to “top”/”bottom” of the bits. In my head, I picture the bit pointing upwards, and so the top side is the side nearest to the centering spur/screw. But actually you refer to that part as the bottom. When I got it, the explanations started to make sense, when matched with the pictures.
Yes, it can be a bit confusing I suppose. I always refer to the orientation of the bit as it is being used. In use, the shank of the bit is at the top and the center point/lead screw is at the bottom.
After I realized that, it made sense. Although consider the following video of your own 😀 : https://www.youtube.com/watch?v=pyfmITHGKpI