
Building a Sliding Lid Candle Box – Part 3
When we last left our sliding lid candle box, we were pulling out cut nails that shouldn’t have been driven in the first place. With that mistake behind me, I turned my attention to finishing the back of the box BEFORE nailing it on.

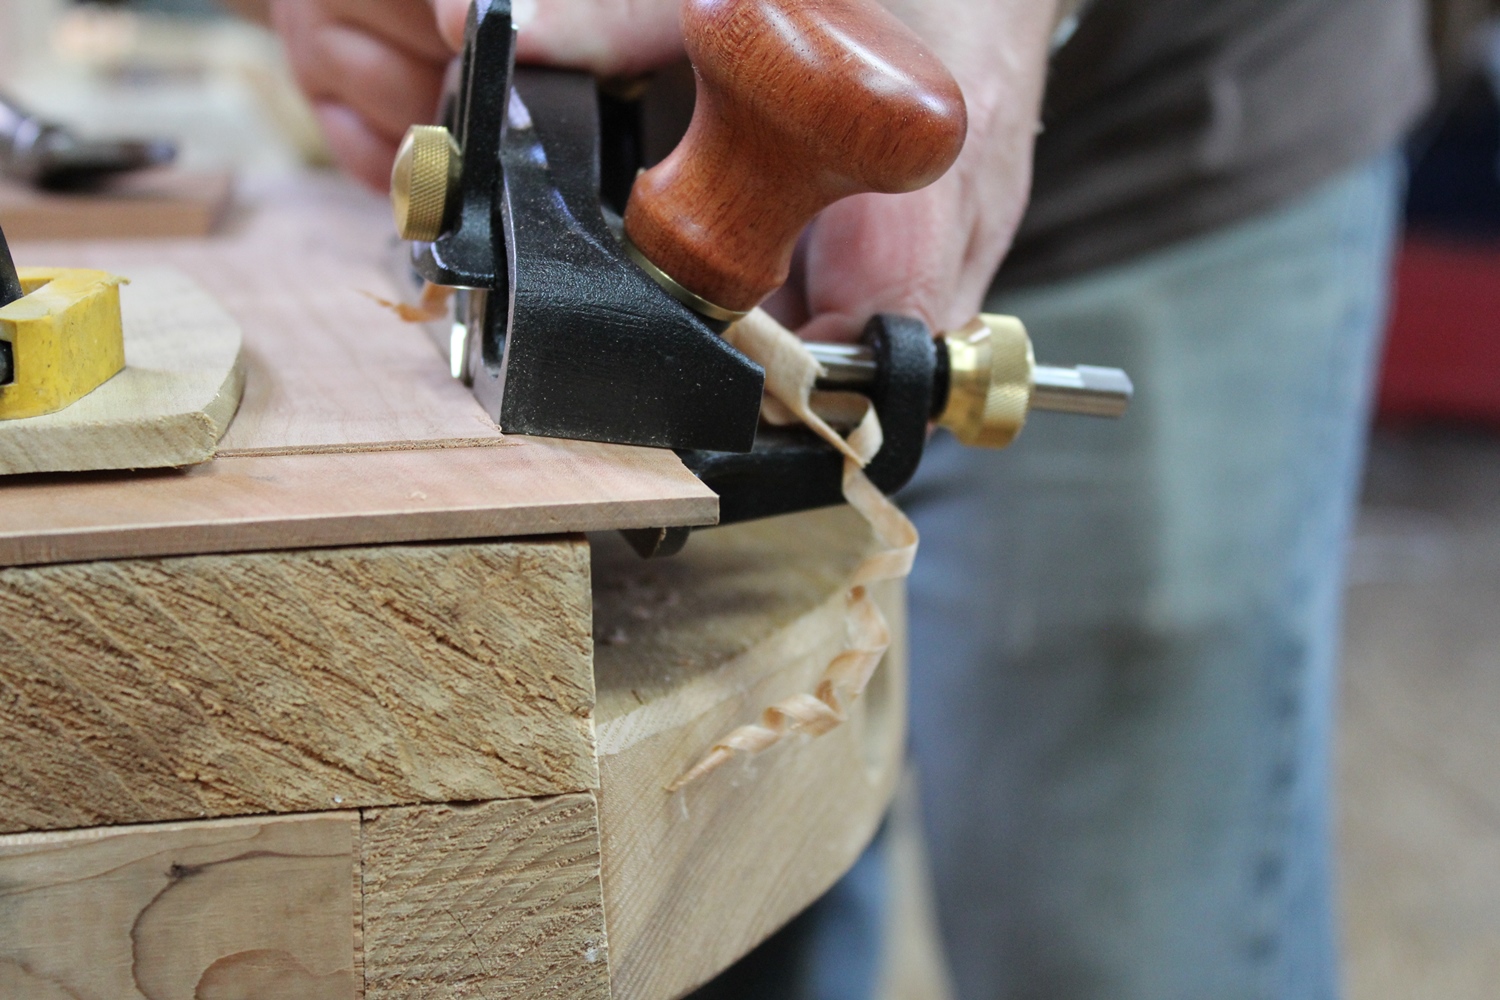
Three edges of the back of the box need to have a quarter round molding profile shaped. I start with the end grain edge. Using a pencil and my finger as a fence, I draw guide lines parallel to the three edges. Then I pared a chamfer across the end grain to guide my molding plane using the pencil line as a guide.

After paring the chamfer across the end grain, I created a matching chamfer on the two long grain edges. This was more easily done with the jack plane. Being able to plane from either direction helps here to ensure that the corner doesn’t tear out in big splinters.

After planing the chamfers, I switch to a hollow molding plane with a 3/8″ wide blade to finish the quarter round profile. The beauty of hollows and rounds is that the nature of their geometry means that a plane with a 3/8″ wide blade will cut a 3/8″ radius arc. So you will always know the radius of the arc that a hollow or round plane cuts just by measuring the width of the iron. I always advise people interested in using hollows and rounds to ignore the number stamped on the heel of the plane and instead just worry about the width of the blade. The stamped number was not consistent from maker to maker, however, a 3/8″ blade will make a 3/8″ radius regardless of who made the plane or what number they stamped on the heel.

After the molding was finished, I planed the inside face of the back to smooth it and remove the pencil marks. Then I was finally able to put the two cut nails back in that I removed last time. With the two cut nails in place in the ends, registering the back in position, I drilled the pilot holes for the remaining cut finish nails.

I drove the remaining cut finish nails, being sure to align the wedge shape of the nail with the long grain of the top board. This ensures that driving the nails doesn’t split the board. Once all the nails were driven just shy of flush, I set them all just below the surface. Since the heads of cut finish nails are rectangular in shape, I made a custom cut nail punch by grinding the sides of a hardened cut masonry nail to just smaller than the head of the cut finish nail.

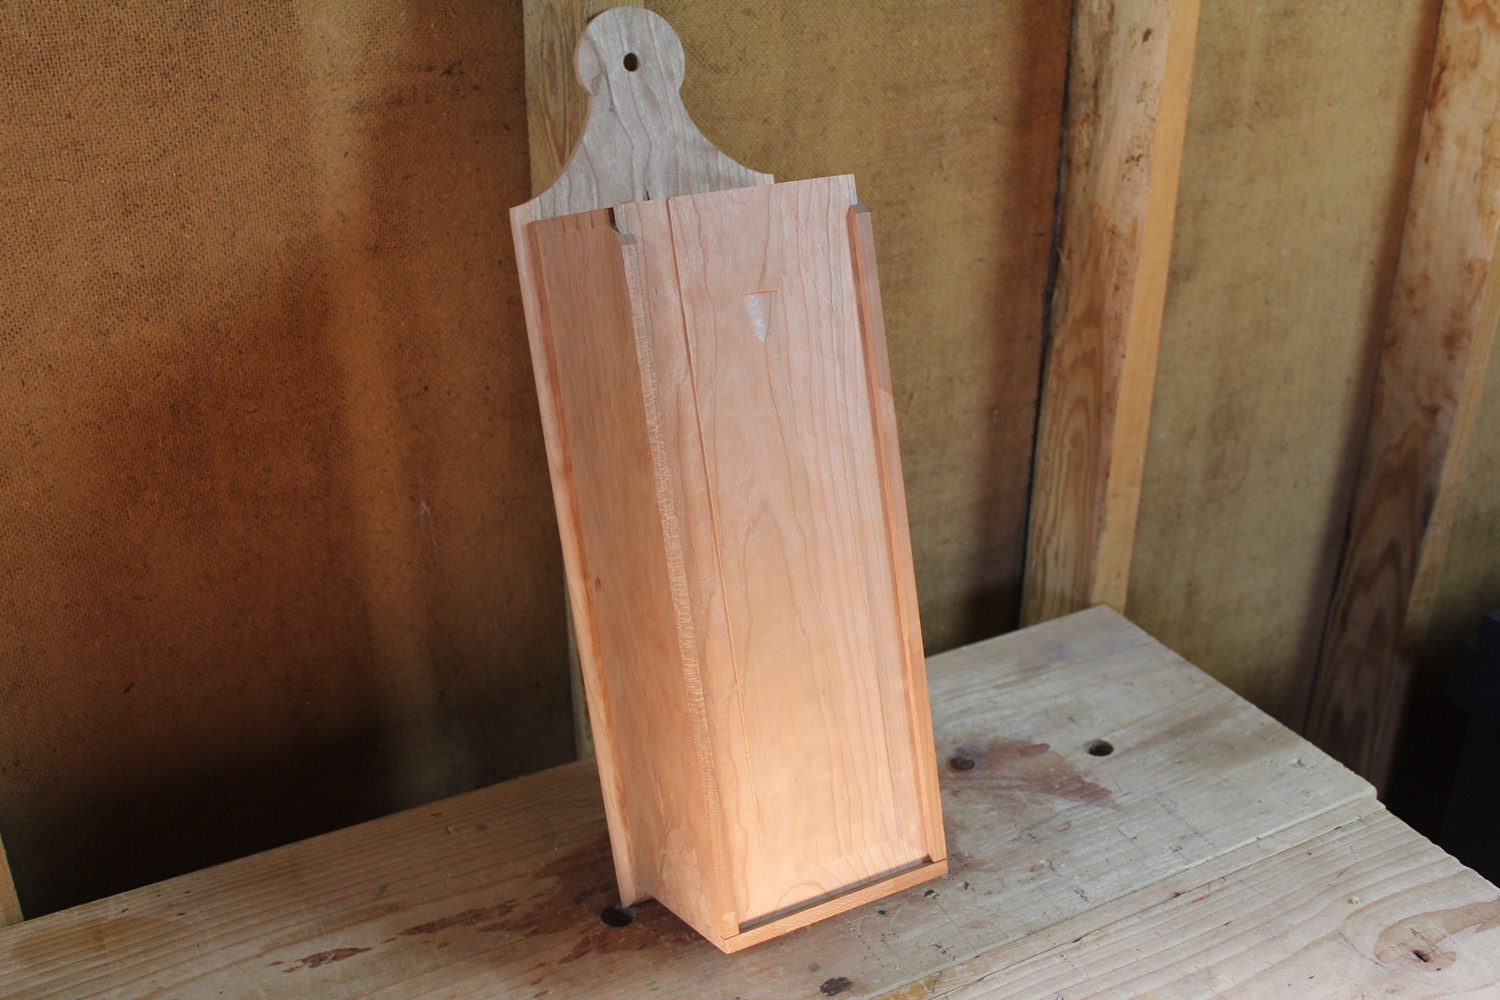
The width of the lid stock was sized to fit between the bottoms of the grooves in the sides. At this point, the lid stock is several inches longer than needed. It will be cut to length after shaping. The lid of the box is essentially a raised panel. You could just plane a bevel on three sides and call it a day. However, I prefer the look of a raised and fielded panel. So I started by defining the field with a fenced rabbet plane. I planed the rabbet about 1/16″ deep and about 1″ wide on one end and the two long grain sides.
The width of the groove that the lid slides in is 3/16″, however, the edge of the bevel needs to be planed thinner than 3/16″ because it is angled. It needs to be no more than 3/16″ at the edge of the groove, so it will end up less than this at the bottom of the groove. I used a marking gauge to lightly scribe a line about 5/32″ from the flat, inside surface of the lid. I then planed the bevel using the rabbet plane held at an angle.
You can make a custom angled fence for the rabbet plane to help hold it at the proper angle, but unless you make raised panels with the same width and angle every time, it’s more trouble than it’s worth. I just eyeball the angle and make minor adjustments as I get closer to the finished bevel. I’ve always made my raised panels this way. Once you do it a few times, holding the angle by hand and eye really isn’t that hard to do.

After planing the bevels, the lid was test fit into the box. Adjustments were made by planing the bevels where they were tight, making sure that the corners stayed even. After the fit was as I wanted it, the lid was marked and cut to length. The final step was to carve in the finger pull. For that, I turned to one of my favorite tools, an in-cannel gouge. You can use a carving or out-cannel gouge as well, but for most furniture work (i.e. not decorative carving) I find the in-cannel gouge far more useful. Once the finger pull was carved, all that was left to do was apply a finish.

4 Comments
Looks great Bob.
Say, what do you shoot your pictures with? DSLR on a tripod with a remote or do you have an apparatus for you smartphone? The reason I ask is because I love shooting with the DSLR but (1st world problem alert: I hate having to take the photos off the SD card, loading them on the computer, and then uploading them to the blog). I was looking into something like this http://www.eyefi.com/ but wasn’t sure if anyone had experience.
I know it’s a bit off topic, but I hope you don’t mind.
If you still use film or copper etch, that’s cool too and you can ignore my question.
Thanks,
Shawn
I use a DSLR on a tripod with a remote. The camera on my phone is terrible. I don’t blog from the phone anyway so taking the pictures off the SD card is no more of a hassle to me than taking them off my phone. Plus I like to rename the files to make things easier to find in the future.
Thanks Bob. I used to shoot with my DSLR on a tripod with a remote and I still do on occasion. Once Apple issued the iPhone 6, I stopped using it. The images are great (especially for blogging) but the one downside is not being in the picture, which is handy for various reasons. I know it’s a question for a blogging, or photo, or youtubing forum but I thought I’d ask woodworkers first.
No worries! I used to shoot with my iPhone (5S) and the pictures were actually pretty good. If you get creative with holding the iPhone, you can use the timer function to be in the picture. I did this a few times by propping the phone on something nearby, but you have to be a bit imaginative when setting up the shot because you have to set it up without you in it, then hit the shutter and get into position. That’s mostly what I always did with the old video camera and DSLR too. I just recently got the remote for the DSLR and it makes things so much easier.
I’d probably still use my phone for a lot of blog photos if I still had an iPhone. We got rid of them though and dropped the big phone company because the cost was getting ridiculous. I rarely used the phone for a phone. It was mostly surfing, checking email, etc. So we dropped the big expensive plan and went with a prepay plan. You buy the phone (my current phone was $20), and then my current plan is about $30 every 3 months. But again, I hardly use the phone for a phone, so for the most part, it’s just for the occasional call . If you use it for business and are on calls all the time, the big plan is probably more cost effective. But the camera on the cheap phone is terrible. I don’t even use it for Instagram most of the time because it’s so bad. I’ll actually take a pic with the DSLR, put it on the computer, and then either upload it to my web site or email it to myself so I can put it on my phone to upload to Instagram (I don’t know why Instagram won’t implement a desktop posting function). It’s kind of a hassle, but the shots from the DSLR are just way better.