
Building a Sliding Lid Candle Box – Part 4
So today I’m finishing up the sliding lid candle box. Up to this point, I’ve finished all of the joinery and fitting. All that remains is to clean it up and make it pretty. I started by cleaning up the surfaces. The dovetails were planed flush before the back was installed. But I needed to clean up a bit of inconsistency in the surfaces before applying any finish. I started with the card scraper, which took care of most of it. I finished up by hand sanding with a little 220 grit paper.

The surface preparation is an important step because the finish will not hide imperfections. Rather, applying finish will highlight any imperfections. So make sure you are happy with the surface before you start applying any finish.
For my box, I decided to try out an old technique for finishing. A few years ago, I received a couple of hand made polissoirs from Don Williams. Up to this point, I had played with them on some sample boards, but I had not used the technique on an actual project. I decided that this would make a good project for experimenting with burnishing and wax filling, and so that’s what I did.
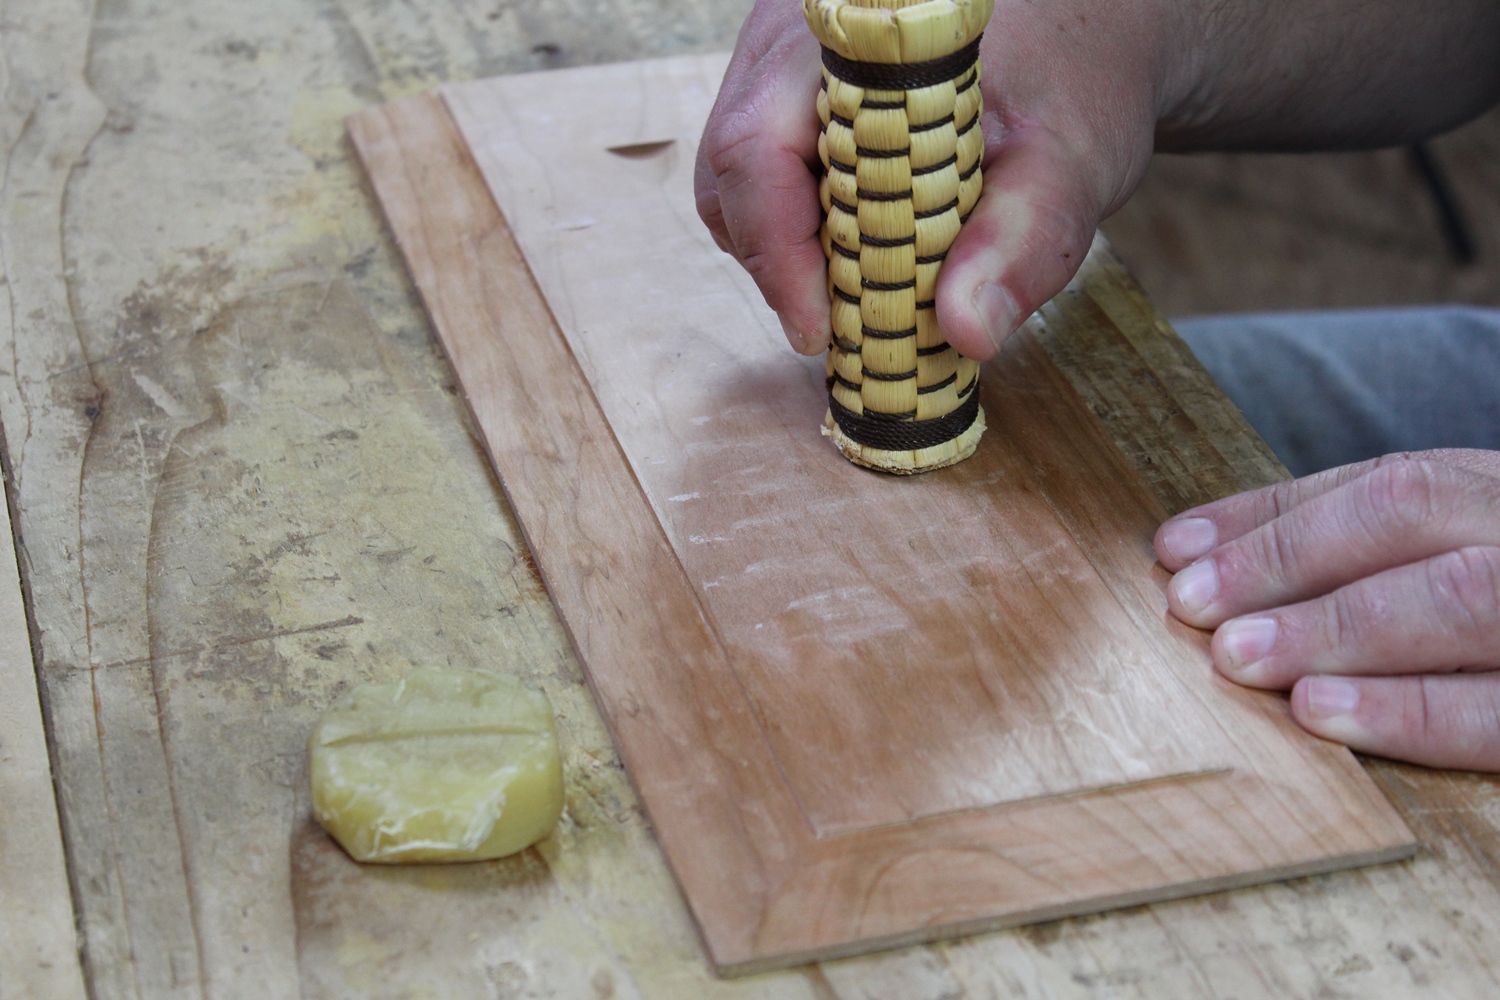
So after completing the surface preparation, I started the grain filling step by rubbing the surface of the wood with a block of beeswax. This is kind of like scribbling with a crayon. I worked the block of wax across the grain to better deposit the wax on the wood’s surface. Then I took the polissoir in hand and began vigorously rubbing it along the grain at a very slight angle to the grain to burnish the wood and generate some heat from the friction. This helps to soften the wax and drive it into the grain, filling the pores. As the polissoir is rubbed across the surface of the wood with a little bit of pressure and some quickness, you can watch the wood’s surface transform right before your eyes, becoming polished and taking on a soft luster that I found very pleasing.

With the surfaces burnished with the polissoir and the grain filled with beeswax, I put the final polishing coat of finishing wax on by rubbing it in with 0000 steel wool. This can of wax is about 15 years old, and is just about empty now, but it still works just like it did the day I bought it. The wax is simply picked up from the can with the steel wool, and then rubbed onto the surface, following the grain. Once all surfaces have a thin surface coat of the finishing wax, I walk away for 10 minutes to let the solvent in the wax flash off.

After the finishing wax has had some time to dry, I buff the surface with a clean, soft cloth. I like to make buffing rags from old cotton flannel bed sheets. One set of old sheets will provide enough rags to last many, many years. Buffing the surface really completes the soft luster. The final surface can only be described as soft. It’s very smooth, with some luster, but not really glossy. It’s a surface that you just want to touch, and I’m really happy with the result. I’m not sure if I’d use the technique on a really large project, especially one that will see a lot of abuse. But for something small like this that won’t see a lot of wear and tear, it’s a great finishing technique that can be completed very quickly because there’s basically no drying time.


2 Comments
Bob, how do you think this technique would work over milk paint? Both with and without the wax. I’m thinking it might take the paint off without the wax but I’m also thinking it might remove the paint even with the wax. Any thoughts?
You know, I’ve never tried it, but I think it would work ok. Milk paint (the real stuff, not the General Finishes acrylic) tends to soak into the wood more than modern paints. So I think it might work fine. I’d certainly recommend trying a test board first, but I think it will work.