
Clamping Assemblies That Are Longer Than Your Clamps
For the last few weeks, I’ve been working on a new bed for each of my two daughters. When we moved into our new cabin back in December, we decided that the girls really needed new mattresses. They had pretty much worn out the cheap, buying club, coil spring mattresses that we bought as their first “big girl” beds when they outgrew their cribs, about 11 and 13 years ago, respectively. We could have just purchased platforms for each of their new mattresses, but our goal in the new cabin is to not buy any furniture or cabinetry that we can build as good or better ourselves (so pretty much everything but upholstered work, and we’re even contemplating trying our hand at that).
So after looking for inspiration online, the girls each found a design that they liked (the same design surprisingly), we drew up a plan, chose the lumber (they wanted leftover white pine from the cabin build), and started building. I’ll get into the construction methods in another post, but as the build got to the point of being ready for assembly, it became apparent that there were going to be challenges when it came to clamping things up.
The head boards and foot boards are each roughly 5′ wide, and the longest clamps that I own have a clamping capacity of only 4′. Were I to have built these pieces using traditional drawbored mortise and tenon joinery, there wouldn’t be any problem as the drawbore eliminates the need for clamps. However, I did not use drawbored mortise and tenon joinery in this case (again, I’ll discuss the construction methods in another post). This poses quite the dilemma.
Of course I could have used this as an excuse to go out and buy a half dozen 60″ clamps – that is if I had an extra $250 to $400 laying around. If I had pipe clamps (I don’t), I could just buy some longer pipe, or couplings and extensions, but even that would cost $20-30 per clamp. However, there are alternative solutions, and I will discuss several that I used for this project.

One way to extend the reach of the clamps that you already have is to simply hook two clamps together. You can do this with just about any clamp, but a clamp with a head that can be reversed (like most parallel jaw clamps) or rotated (like most pipe clamps) works best for this. If you can reverse the heads, like in the photo above, it makes it easier to get a good purchase with the opposite end of the clamp. If you can’t hook the two clamps together, you can also try clamping them together with a smaller clamp or two. You can use this method by yourself, but it helps tremendously if you have a second set of hands.

Another of my favorite techniques for clamping up assemblies that are longer than my clamps is to use a few ratchet straps. In many cases, a single strap is all you need, but you can also hook multiple straps together for even longer clamping capacity. Put a sacrificial clamping block under the strap to prevent the strap from damaging the work when you tighten them up, and you’re good to go. You will likely require a second set of hands to help with this arrangement as well.
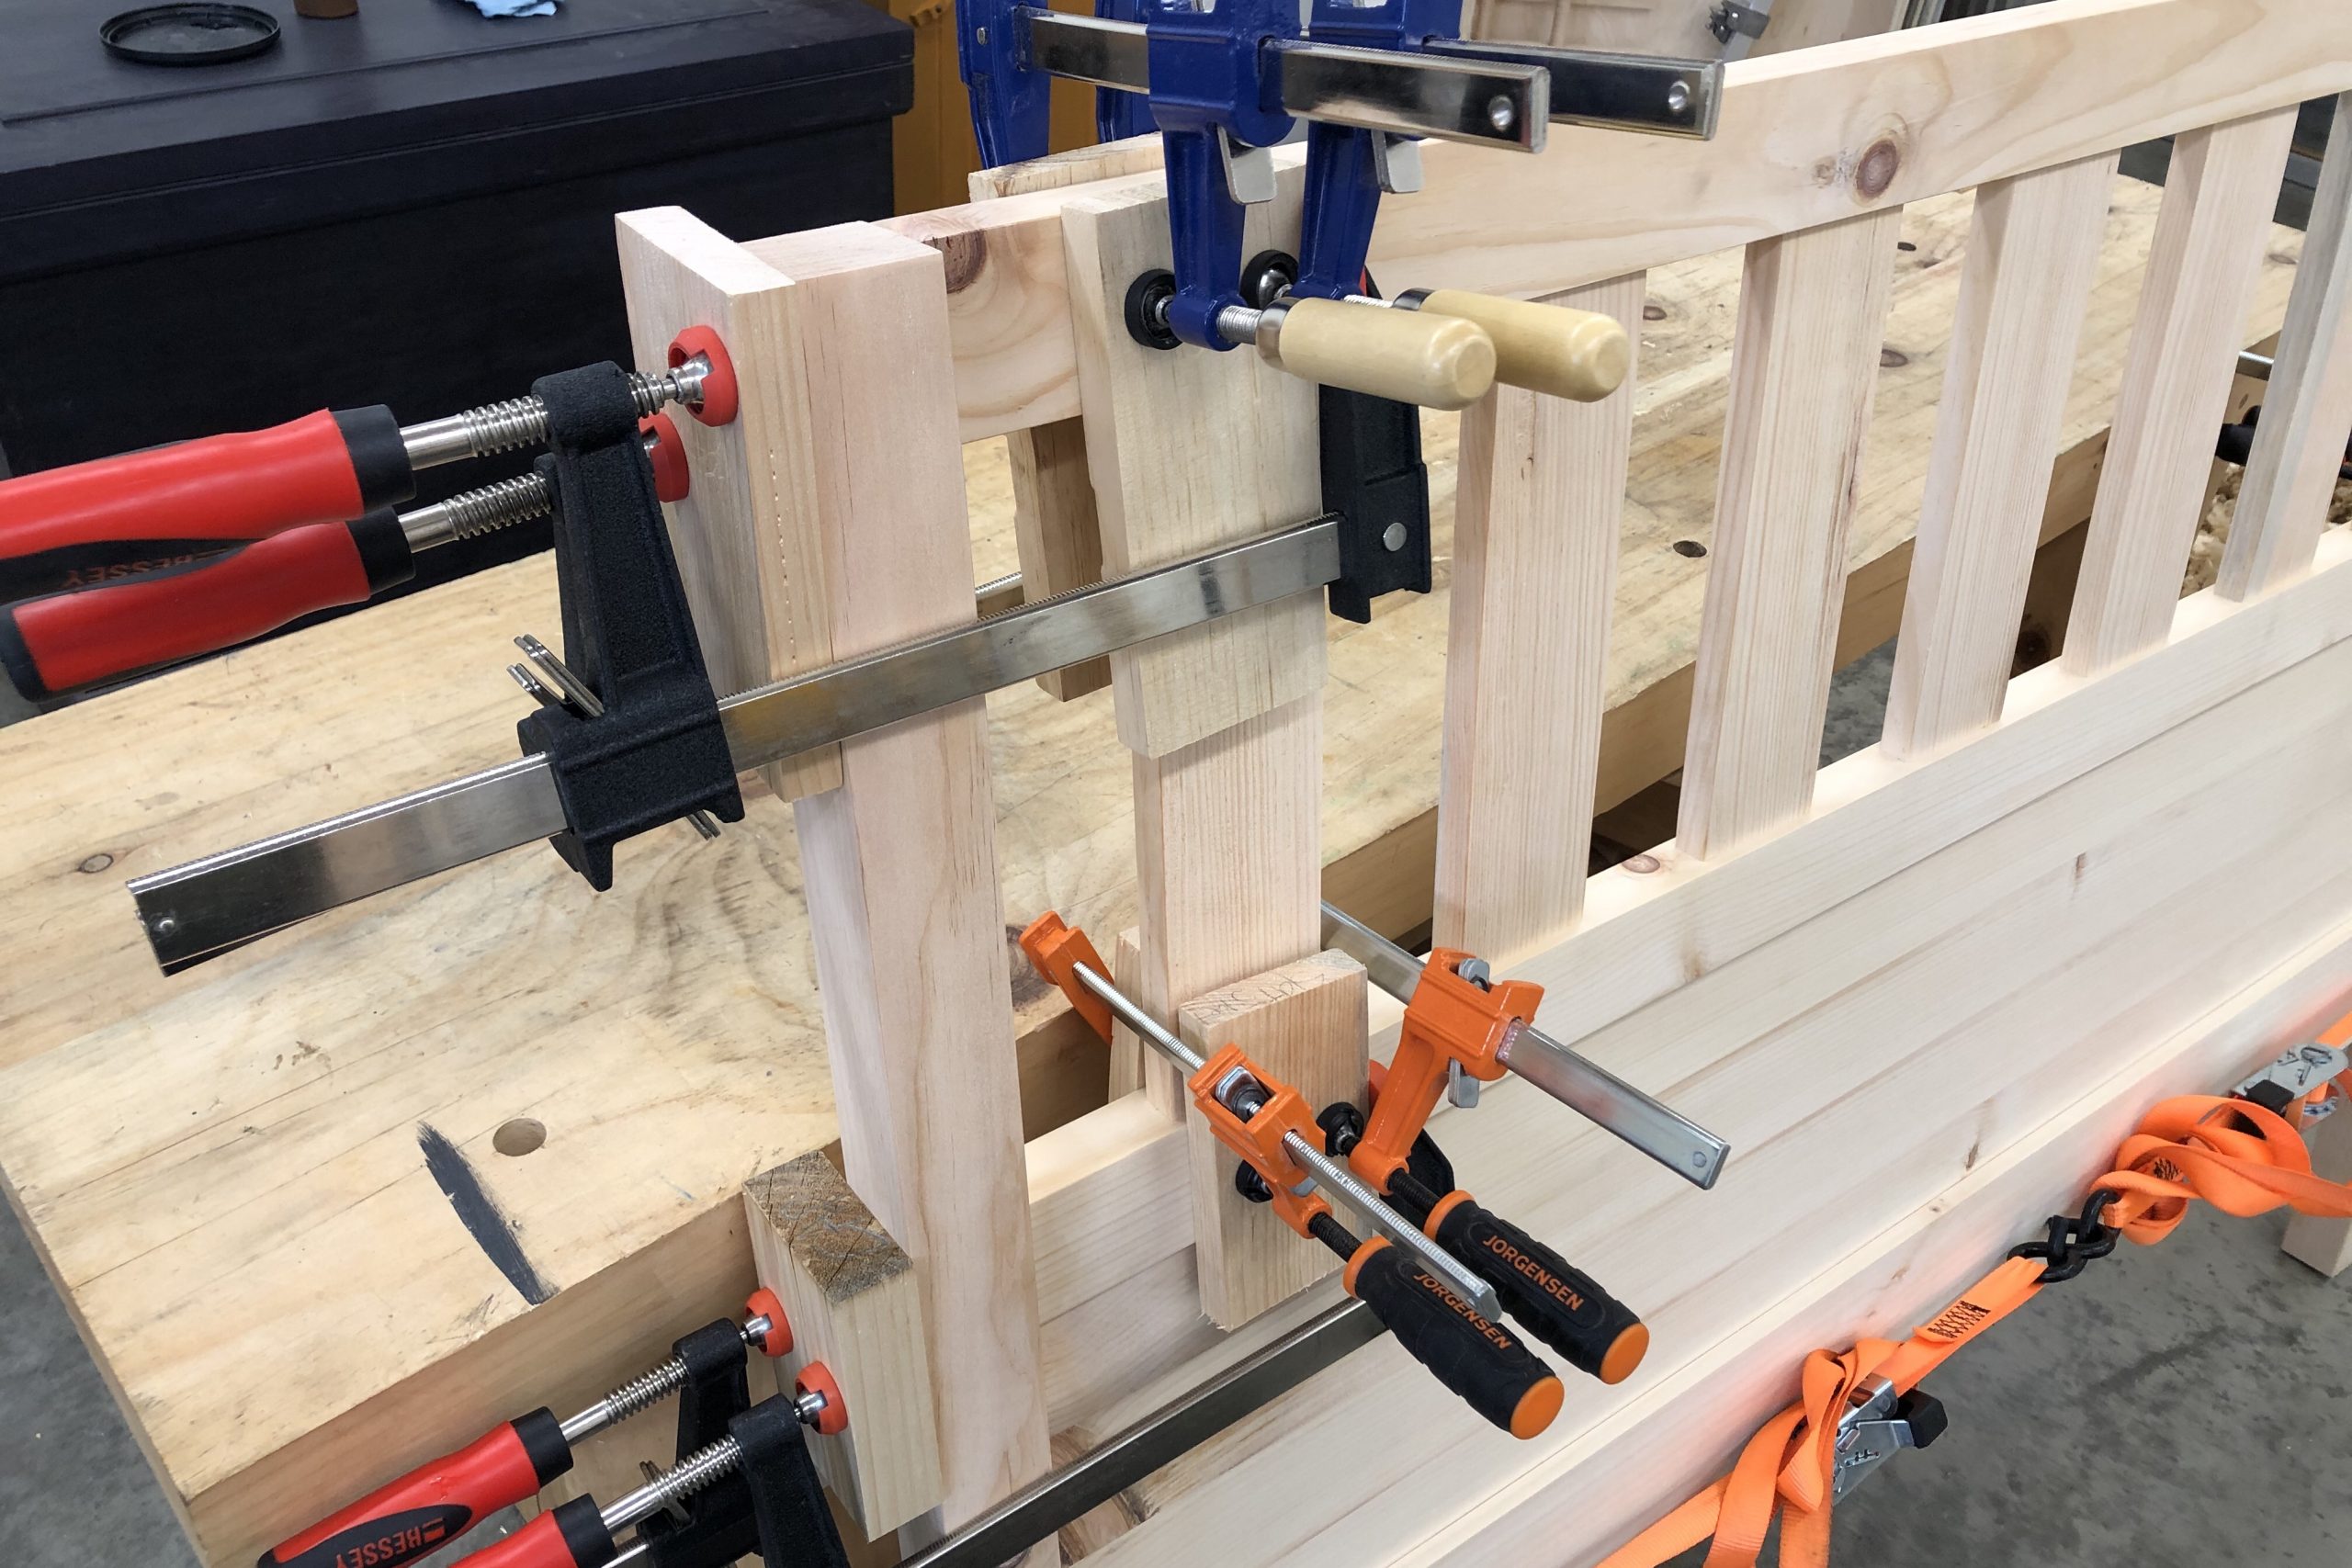
One of my favorite methods for clamping up large assemblies, especially when there’s no one around that can lend a hand, is to use multiple small, but easily manageable clamps to create a smaller clamping distance. By clamping some scrap blocks to the long pieces (the rails in this case), you can use a shorter clamp (or two) to pull on the scrap blocks and draw the joint up tight. Here, I was able to clamp up a 5′ long assembly using nothing but 6″ and 12″ long clamps. Of course this method requires that you have enough smaller clamps, but these are the most used clamps in the shop anyway, so most people will have enough, even if the assembly has to be done one joint at a time.

Of course there are other solutions as well. You can make wooden clamp extenders, like those pictured in Roubo. A Spanish windlass is also a possible solution, depending upon the nature of the assembly (is there room to twist the ropes?). You can also make your own clamps. While I didn’t do so for these beds, only because I had alternate options, it would have been easy enough to make some long clamps by drilling some holes in a couple of long boards, inserting some dowels in the holes, and using wedges to tighten up the joints. The example above uses square pegs and holes, but using round holes and dowels would make the construction even easier.
Or you can just use a drawbored mortise and tenon and avoid this situation altogether.
Tag:Clamps & Vises

4 Comments
Always, always splendide information. Thank you Bob!
Thank you!
Yes Bob! great examples – just what my novice self was after
Glad that the ideas were helpful!