

Craftsman Hand Plane Restoration – Part 1
With my 2017 seminar and class dates fast approaching, I’ve been working on a few tools for students to use at the school. These are separate from the tool donations that I wrote about in my previous post. I haven’t gotten around to working on any of the donated tools yet. The tools that I’ve been working on are ones I have purchased myself that will be for student use at the school and also at my shop when I teach private classes there.
Today’s subject will be the first of these. This is a plane I got for $15. Hardly a steal, but when you compare it to the going rate for #4 sized planes on Ebay these days, it’s not bad at all. One of the things I always tell new woodworkers is to watch out for “off” brands as you can get yourself a real bargain by not setting your mind on the Stanley name, if you know what to look for. This is one of those cases, and it’s a name I look for often when I’m shopping for old tools.
The Sears & Roebuck company has never been a manufacturer of tools. In fact, Sears was one of the very first companies who contracted with manufacturers like Stanley, Sargent, and Millers Falls, and re-branded those manufacturers’ products with their own logo. So if you purchase an old tool with the Craftsman logo on it, there’s a 99.9% chance that your tool was in fact made by one of the other big name companies that were in business at the time. I own and have handled many old Craftsman tools, including a bevel gauge that is identical to a Stanley #18 ($7), a hand drill that is identical to a Millers Falls No. 2A ($10), a bit brace that is identical to a Miller’s Falls Holdall ($5), auger bits made by Irwin, a block plane made by Sargent, and a combination plane that is identical to a Sargent 1080. Every one of these tools was/is just as high quality as those with the more popular names.
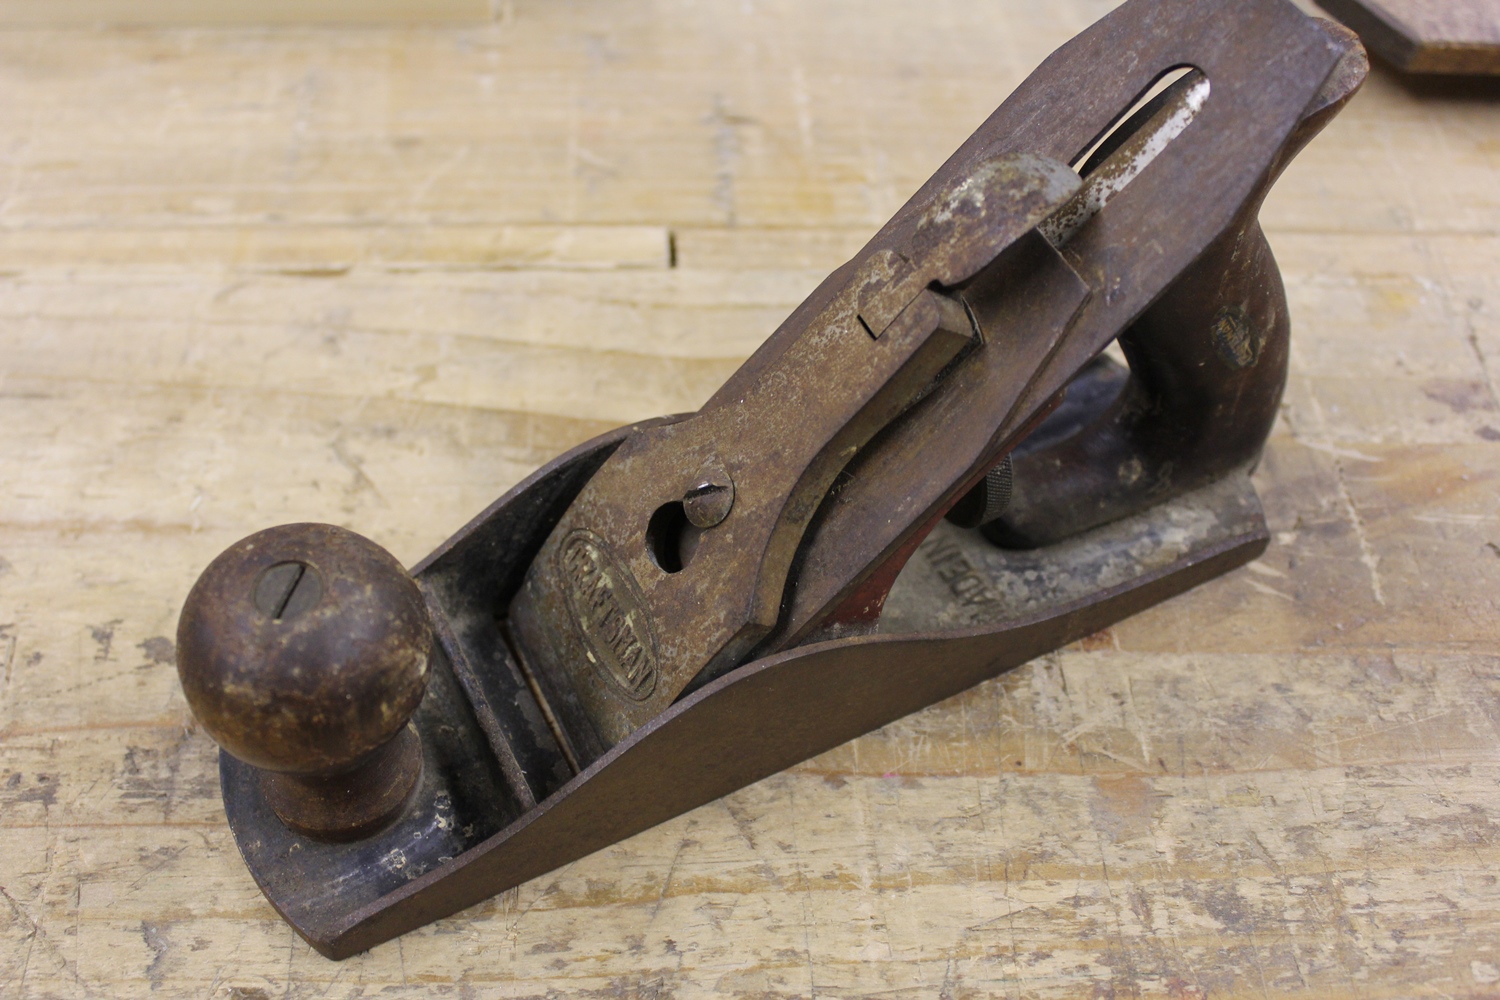
This particular plane could have been made by any number of companies that Sears did business with over the years, including Stanley, Sargent, and Millers Falls. This one adjusts like a Stanley (i.e. spinning the knob clockwise advances the iron), so I don’t think it’s a Sargent made plane (Sargent planes adjusted the opposite of Stanley, i.e. spinning the knob counterclockwise advances the iron). But the adjuster wheel has an unusual knurling not usually seen on Stanley planes, so I’m not sure it’s a Stanley made plane either. Never the less, I don’t really care who made it because it’s still a quality tool and will make a good user plane with just a bit of work.

The features that make this plane a good candidate for restoring into a quality user have nothing to do with the name cast into the lever cap. Here are the things I look for when I’m considering a plane for use:
- A solid casting – This is somewhat subjective as opinions on body castings will vary from person to person. But I look for something that feels like it has some weight. This is obviously not possible to do over the interwebs, but if you look at a lot of good pictures of planes, you’ll start to see what a thin casting looks like and what a nice heavy casting looks like. The good quality castings all have a more solid look to them.
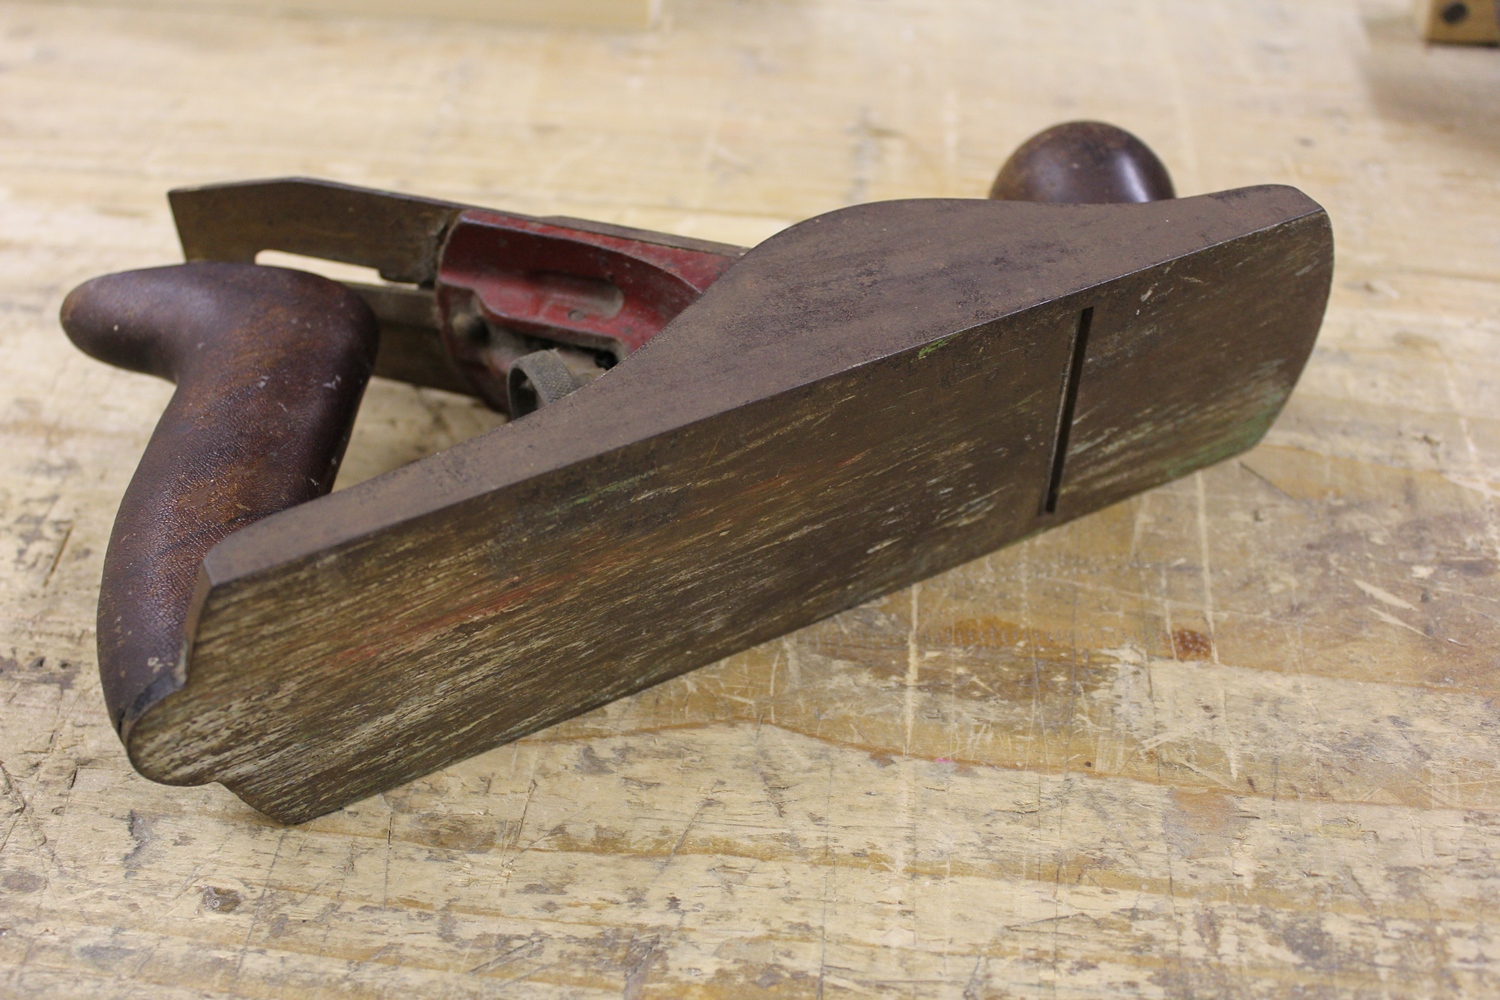
- A large flat bed – The later planes had recesses machined into their frogs to make creating a flat surface easier. While this is a great idea from a manufacturing perspective (it’s easier to do that milling the entire frog surface flat), it doesn’t help the function of the plane, and in fact, it removes support for the iron. Anything done only to improve manufacturing efficiency, without improving function, in my mind only serves to cheapen the product. I like the large flat frog surface (see photo below).
- Brass components – I don’t like plastic adjuster wheels. Sure they may function just the same, but they were nothing more than a cost saving measure and represent a time when hand tool quality was steadily declining.
- Rosewood tote and knob – All the best older hand planes used rosewood for their totes and knobs. Stained hardwood was, again, a cost saving measure and, in my mind, represents a lower quality tool. I won’t even discuss plastic here.
So with the plane in hand, I first check that all of it’s parts are functioning. Can I remove the lever cap? Does the depth adjuster knob spin? Does the lateral adjuster work? I look at the iron set and make sure they are proper for the plane. If the plane has the wrong chipbreaker, the adjusting yoke may not be able to advance the iron through the mouth, or retract it for that matter. I also make sure there isn’t so much rust that things are going to be badly pitted. Minor pits in the iron body are usually only a cosmetic problem. However, if the pits are deep and the body resembles baby Swiss cheese, it’s usually best to pass. This example looks pretty hideous at first glance. But upon inspection, the rust looks to mostly be on the surface and the pitting looks minor enough to warrant further work.

So the first step is to disassemble as much of the tool as easily possible. I try to get everything off if I can. Removing the adjusting yoke from the frog may seem like an intimidating part of the disassembly, but with an inexpensive punch, the pin drives right out and you can easily remove the yoke for inspection and cleaning. In this case, (as in most of these planes) the lateral adjuster is firmly riveted to the frog. The only way to remove it would be to file off the peened section of the rivet. But then I would need to find a new rivet to put the adjuster back on – not worth it in this case.

With everything disassembled, I look all the parts over carefully and make a decision on next steps. If the plane were oily or greasy at all, the first thing I would do is to wash all the parts thoroughly. For light oil and grime, I just take the parts to the kitchen sink and give them a good scrub with dish detergent and a stiff nylon bristle brush from the dollar store. For really heavy grime, I’ll spray the parts with a commercial degreaser first and then wash them in the sink. These parts weren’t oily at all, so I just brushed off the loose dirt and dust, and sorted them into parts that needed a lot of rust removal and parts that just needed a little. Those that needed a lot of rust removal would spend the night soaking in a tub of rust remover (it’s warm enough here right now that it won’t freeze). Those that really didn’t warrant a soak (including all of the brass parts), went right to the next step.

Wire wheels get a bad reputation if you ask me. Used carefully, a soft wire wheel mounted to a bench grinder or drill press can save hours of manual work with a wire “toothbrush” and/or steel wool. But speed comes at a cost. You need to have a soft touch when using these methods to avoid overdoing it. If you’re too ham handed at the grinder, you’ll end up with parts that look like they’ve been cleaned on a wire wheel. Softer metals like brass are particularly susceptible to scratching, but I’ve seen harder metals succumb to it as well. The trick it to go easy and just let the tips of the wheel do their job with the minimum amount of pressure necessary to remove the oxidation, but not any of the good metal. The softer the wheel, the easier it is not to overdo it. Avoid wheels with bristles that are not easily bent by hand.
I took all of the parts that didn’t need to soak to the wheel to clean the oxidation off. Areas that the wire wheel couldn’t reach (like the inside of the brass adjuster wheel in the photo above) got cleaned up with some metal polish and steel wool. The parts that were soaking in the rust remover were allowed to soak overnight. I removed them in the morning, rinsed them off in clean water, and then took them to the wire wheel as well to take care of any oxidation that remained after the soak.

Now that everything is clean and free from rust, it’s time for the next decision to be made. Do I just want to put this plane back to work, or do I go a step further and make it pretty again?
Tag:Hand Planes

4 Comments
I found my fathers old Sears 107 – 37033 hand plane but is missing a few parts, Lever cap, Chip breaker,and the blade. Can these be found anywhere?
Your best bet is going to be to look on ebay. But finding old Craftsman plane parts is going to be rare, even on ebay. Replacement blades can be bought new, as can chip breakers. But most of these are designed for Stanley planes, so depending upon your specific vintage of Craftsman plane, and which major manufacturer made it, a modern replacement blade and chipbreaker may or may not work properly. You can also reach out to some of the bigger old tool vendors like Patrick Leach or Jim Bode and ask them if they might have any extra parts laying around.
Hey bud, cool restoration. I can confirm with about 99% certainty that this is a Spring/Summer (Sears Catalog) 1934 model 5264 made by Millers Falls. That makes it much older than the other guy reckoned in the part 2 of this article. That makes it more collectible than you thought, but still probably worth under 100 in Very Fine quality. To confirm what I’m saying just Google search “Craftsman Hand Plane Reference Data 7.1” and the second result will be a wonderful spreadsheet put together by some unknown madman savant. I came across it, and your site, because I was desperately trying to figure out what was going on with this craftsman 5264 I just got for 10 bucks that looks at once both old (SW Era Stanley) and newish (post-post war decades). The overall quality and the stunning rosewood made me think it was something special. Turns out, I have the first craftsman handplane ever made! I can’t find any on the internet outside of this chart, but it no doubt matches the specifications. Thanks for the article and a place to rant about my newest love.
I got one that looks just like that. It has 4C imprinted on the side. I really like the feel of this plane, probably my favorite. It probably has a replacement iron since the iron has no markings.