
How to Re-handle a Chisel
About 6 years ago, I spent a couple of months putting together a set of straight sided firmer chisels for my period tool kit. I had a set of 12 chisels from 1/16″ wide up to 2″ wide. I replaced all of the handles on the chisels with period appropriate tapered octagonal handles made from beech. I even did a video on making the handles for those chisels, which you can watch below if you’d like.
I sold that set of chisels last year when I was thinning down my tool collection, but I did keep a few extras that I had laying around to use for a tool kit that I use for period woodworking demonstrations. Recently, I decided to replace the handles on those chisels with similar tapered octagonal style handles. These days, I prefer a slightly different style of period handle that is more of a curved tapered octagon with more even facets. These are the style of handle that my carving chisels have.

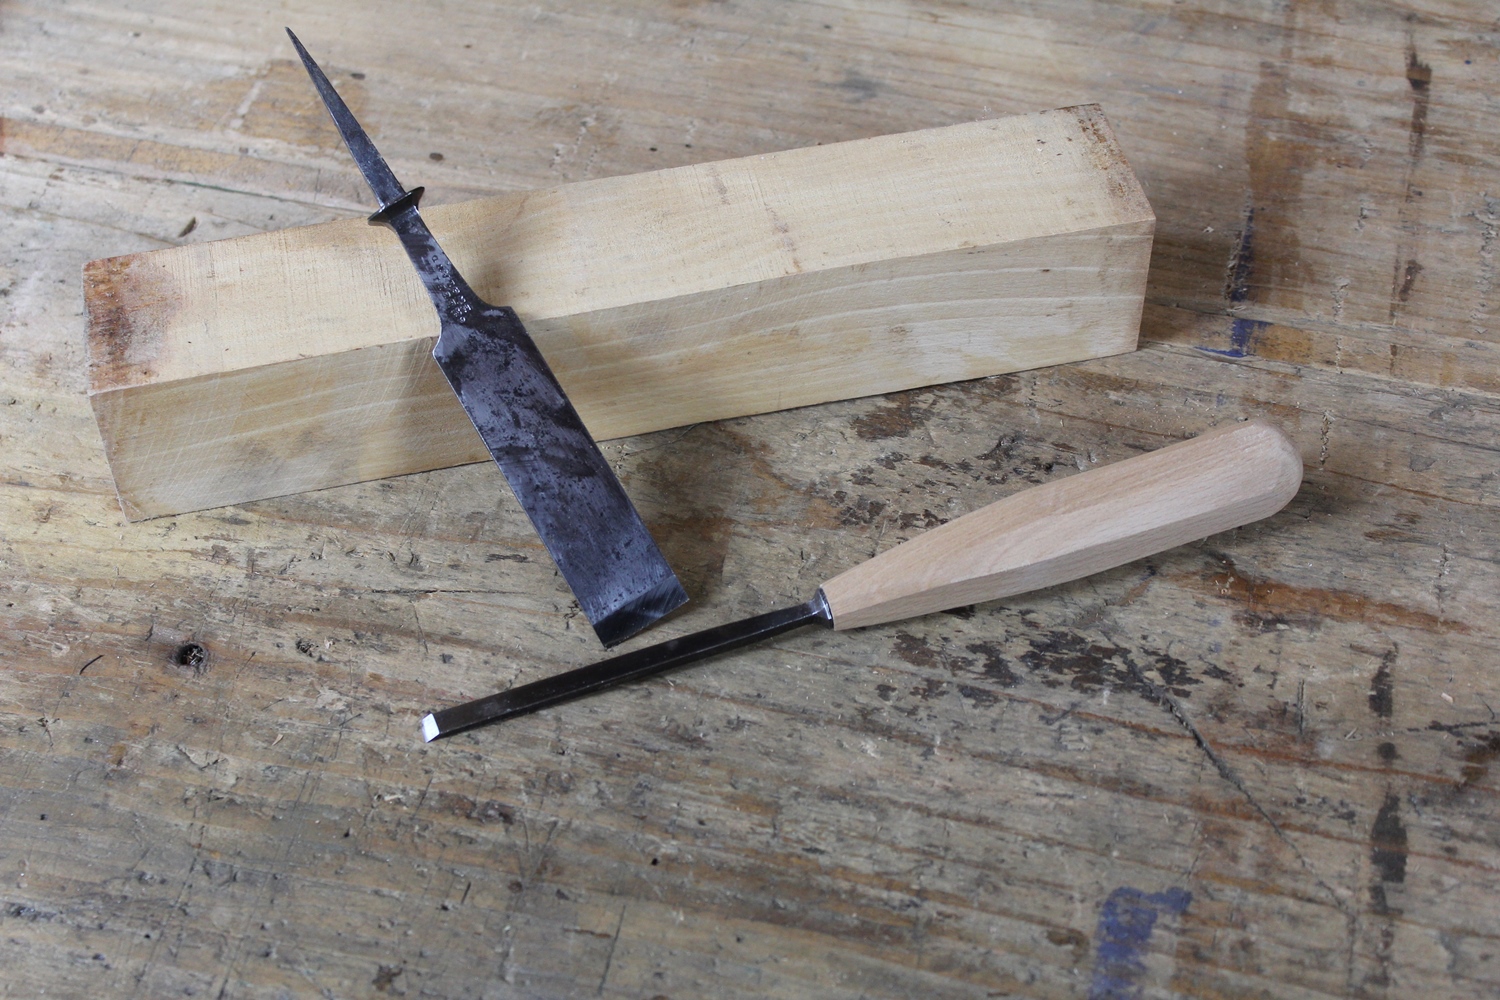
So to start the process of making a new handle for the chisel pictured above, I created a template of the shape from a carving chisel with a similarly sized blade. The curved profile is quite subtle, but very noticeable in the hand compared to a handle with straight tapered sides. The blank that I used for the new handle was left long and planed to a perfect square cross section the appropriate with of the pattern. Alternatively, if you are not confident in your ability to bore a plumb hole in the end grain of the handle blank, leave the blank over sized and adjust it after the chisel is fit to the handle. I show you how to do this in the video at the bottom.

I drill the handle for the tang of the chisel in two steps. The first step is to drill a hole the full length of the tang, or about 1/16″ deeper, with a small drill bit. Something about 5/64″ or so is about right for this full depth hole. Then I switch bits for one that is about as wide as the midpoint of the tang and drill about half way as deep as I did with the first bit.

Once the holes are drilled, they need to be tapered to accept the tapered tang of the chisel. Over the years, I’ve seen lots of recommendations for how to accomplish this. Everything from chiseling the taper (I don’t know anyone who can do that reliably) to heating the tang red hot over and over and slowly burning the taper into the handle. I suppose that the chiseling technique might work if you’re really good with a really small chisel inside of a mortise that you can’t see into, but I’m not that person. And while the burning technique might work just fine, I have two major problems with this method. First, I can’t imagine that repeatedly heating the tang to red hot can be beneficial to the temper of the chisel. I also can’t imagine that repeatedly charring the inside of the handle can be good for the integrity of the wood. Second, I’ve split open dozens of old chisel and gouge handles over the years looking for evidence that this technique was used, and I’ve not once seen any evidence inside of the split open handle that would lead me to believe that burning in was a common practice. I will continue to have an open mind about it, but until I see an original handle with visible evidence of the tang being burnt in, I will remain very skeptical of this method.

Instead, I use a method that I think is pretty unique today (though I believe it may have been very common in the period). I use the tapered tang of the chisel itself as a reamer to ream out and taper the hole in the handle. By clamping the chisel in the vise and using the chisel’s tang to ream the hole, the taper of the tang fits the hole perfectly every single time. The trick is not to go too far. You want to ream only deep enough to establish the matching taper in the hole you bored, but not all the way to the bolster, or the fit will be too loose. I typically try to ream so that the chisel gets tight about 1/4″ from the bolster. The handle will be driven on the rest of the way later.

With the hole reamed, I mark the outer limits of the chisel’s bolster on the end grain of the handle as a guide to taper the handle down to. I then remove the chisel for shaping the lower portion of the handle. The cardboard pattern is used to transfer the shape to the faces of the handle, then I turn the square blank into a tapered square handle by removing the wood outside of the layout lines. I used to establish the taper by planing it in (see the video below), but I’ve found that using a chisel or drawknife is much faster. By leaving the handle blank extra long, there is plenty of extra wood to allow holding the blank in a bench vise, shaving horse, or between centers on the lathe.

After shaping the primary tapers at the bench vise, I moved to the shaving horse so that I could hold the stock on its corners for shaping the tapered square into a tapered octagon. I used to be very meticulous about marking this out in pencil so that I got really precise facets. These days, I’m usually too lazy to do so, so I just eyeball it. The facets come out a bit less perfect this way, but I get done much faster. I also don’t fret about tearout or other imperfections. These handles are pretty quick and dirty for the most part.

With the bottom portion of the handle shaped, I cut the handle to final length, align the chisel with the handle, and drive the handle home until the bolster contacts the handle. Then it’s back to the shaving horse to shape the upper portion of the handle. The shaving horse holds the chisel surprisingly well while I use the spokeshave to finish tapering and cutting the facets on the upper portion of the handle.
After finishing up the octagon, I use a chisel and rasp to round up the end of the chisel to make it more comfortable to push when paring. On my old chisels, I left the ends of the handles with just a chiseled bevel and a flat end. I thought this would provide for better registration of the mallet when chopping. And it did, but it made paring with the chisels less comfortable. The rounded end is much nicer to hold in the hand. I finished up with a bit of scraping and that was it. No finish. Over time, these handles will take on a nice patina and being finish free, they are not the least bit slippery in the hand.
Here’s the old video I did on making handles similar to these.
Tag:Chisels

4 Comments
Hi Bob,
My father has a collection of vintage woodworking tools, not just chisels but other stuff, a lot of different types of planes. I expect that one day they will be mine and I may need to restore a few. Great article. Thanks.
Bob, I have some chisels that appear to be shop made. They came in a tool chest I acquired along with several other tools. According to the previous owner, it was his grandfather’s. His grandfather had emigrated to western Canada in the late 1920’s from his home country, and when he moved east to Ontario in the 1930’s, he arrived with the toolchest. This chisels in question bear no makers mark and the thickness and steel tell me these would be suitable for paring only. The side bevels are smooth (no grinder marks), but not always even (the left and right bevel along the edge may be slightly different sizes). He had worked in a local furniture factory until the early 1970’s so I suspect these date from this period, as they The part about the chisels that confuse me is the tangs do not have built in bolsters. The current handles are obviously challenged by this, being pushed to the limit with indents to the ferrule, and the worst with cracked handles or blades embedded in the handle. Not sure there’s much to be done about the handles, but replace and re-ferrule, if you have any suggestions for re-handling a bolster-less, tanged chisel, I would appreciate it.
Since I’m typing about chisels, I have a second restorative question. I have some other surplus chisels acquired from an auction purchase. This gentleman was obviously a prolific turner (had a couple high end lathe’s in his basement shop – problem was figuring a way to get them out!), but appears to have applied the same high-speed grinding technique to sharpening his chisels as his turning tools. Not to say they are blued, but sharpened to within a fraction of the inch of the socket with obvious signs of grinder marks rather than highly polished faces. Most of them need re-handling if they are to be used as chisels (socket type) but can’t see the point myself. I was looking for reuse ideas. I thought about grinding flat and making a stamp/makers mark or the like, but maybe there’s another tool specialty they might be suited to that I haven’t thought of. I have a cousin who does blacksmithing so I may just offer them to him to reclaim as tool steel.
I listen to the podcast so I can pick up any discussion/answers there too if you’d like to save for the podcast. Thanks!
Definitely podcast fodder, but I can answer it here too because some folks don’t listen to the podcast 🙂 .
Your chisels are almost certainly hand made if there’s no bolster, but hard to say without seeing them. Turning chisels have no bolster and are sometimes mistaken for old bench chisels, but if these are bevel edged and on the smaller side, they’re probably not turning chisels. There is a way to add a separate, loose bolster if you want to, but it requires quite a bit of metal work. Think washer. Essentially you create a thick washer with a square hole that would bottom out on a shoulder filed into the tapered tang of the chisel. The “washer” then acts like a bolster.
As for the socket chisels, if they are ground down almost to the socket, they could still be used for chopping dovetails if the steel that close to the socket has been hardened. I’d question whether or not it has been though. Especially if he was grinding them that aggressively. He may have even drawn the temper, if they were even hardened all the way to the socket on the first place. Try to file the steel. If a file cuts the steel, they’re too soft to hold an edge. If the file skates over the surface and doesn’t cut the steel, then they’re still hard enough to hold an edge. If they are too short to use though, their only real uses left is to be reforged into something else.
The burn in method actually works great. Far better than I’d have expected, but it’s easier if you pre drill a hole. The benefit with it is that the handle is removable, but the burn leaves a somewhat rough (which is probably achieved through rust, but would’ve been on forged tooling) surface inside the handle or maybe there’s something else going on – point being that I was afraid that ash would leave a poor grip, but the actual grip on the tang is pretty incredible.
I’d imagine that the reason you don’t find many burned handles is that there are very few chisels around that weren’t factory made. It would’ve been faster in a factory just to drill a hole close to size and hammer the handle on with linseed oil assisting or something like that.
Time was money, even in 1830. We sometimes think in terms of the industrial revolution as the time things were factory made, but the perspective in years in europe needs to be bumped back pretty far.
My point is, it’s a practical method for someone in the 21st century. The tang on a chisel should be something other than fully hardened, anyway, but is a pretty large cross section on a quality chisel. Different story maybe on gouges, but I haven’t done those and would probably drill and use a slight glue assist if necessary.
When you look closely at the grinding work done on the bolsters and tangs of old chisels, the economic perspective of the worker (do it fast) is pretty evident.
This is a picture of the first semi finished chisel I made forged and ground out of a file with a separate bolster heated and hammered onto the tang. The surfaces have since been finished after tempering, but you can see the handle (which i intended to be temporary, but it’s growing on me) has a couple of small cracks. Lesson learned burning the handle on – burn it almost all the way if there’s no ferrule, because just a little bit of driving it home will crack it. Still, I needed to temper the chisel a bit further after the first shot so that it could be sharpened more easily on oilstones and it was extremely hard to get off despite being burned on and then cracked a little bit. In the tang heat, no part of the chisel below the bolster got red (really high heat isn’t necessary), nor did the bolster, and I held the chisel blade itself halfway up to determine the heat level. If it got too hot to hold, i dipped it in oil.
This is beyond beginner stuff, though. If a beginner asked me what to do, I’d say drill the handle just a bit too large and glue it in. it can always be split off later ,and the epoxy can be filed or chiseled off.