
Making a Scratch Stock
Making moldings is one of the tasks we do as woodworkers that seems to intimidate many who are new to hand work. Lets face it, it’s pretty darn easy to chuck up a router bit in a router table and make miles of the stuff. But when you do it by hand, it’s not always so straight forward. Complex molding planes that cut the desired shape make the job pretty easy. But there’s still the challenge of holding the plane at the proper spring angle while you walk along planing an 8′ length of stock. Hollows and rounds are a bit simpler in terms of sharpening and tuning up the tools, but they take a bit more finesse to get a consistent profile along a long length than a dedicated complex molder.
I have and use both of these options, but sometimes a particular profile just calls for something simpler. It’s true that pretty much any profile can be cut with hollows and rounds. But what if you don’t have the right sizes of hollows and rounds that you need for a particular profile, or worse yet, what if you don’t have any molding planes at all? As I looked at two such profiles that I needed to make for a joint stool I started some years ago, I realized it would take seven different planes to make these two profiles. I have the planes that I would have needed, however, what if you’re just dipping your toe into the wide world of hand cut moldings and you aren’t quite sure about making the investment in molding planes just yet? Enter the lowly scratch stock.
If you’re just getting into hand work and you’re feeling a bit overwhelmed by all of the options in molding planes, you can breathe easy. While you won’t be using a scratch stock to make that cornice on the Chippendale high chest you’ve had your eye on, you can make a fair variety of simpler decorative elements with nothing more than a scrap piece of wood and an old worn out hand saw or an extra card scraper.

Start with an old hand saw or spare card scraper. This is a real thick Clifton card scraper that I don’t like for scraping because it doesn’t flex much. This makes it good for scratch stock though. I’ve already cut a piece out of this one for another scratch stock. Use machinist’s layout dye, or alternatively, a permanent magic marker, to color the steel. Then draw the profile in with the point of an awl.

Use files to create the negative of the desired molding profile in the edge of the scraper stock. Lay this out carefully because you’re laying out and filing the negative of what you ultimately want to scrape into the wood. Here I just needed to use a small chainsaw file and a taper saw file.

Once the negative of the profile is filed into the scraper stock, cut it free from the larger piece. There are lots of ways you can do this. A hacksaw works, as does a cutoff wheel in a Dremel tool. File the cut edges flat and smooth.

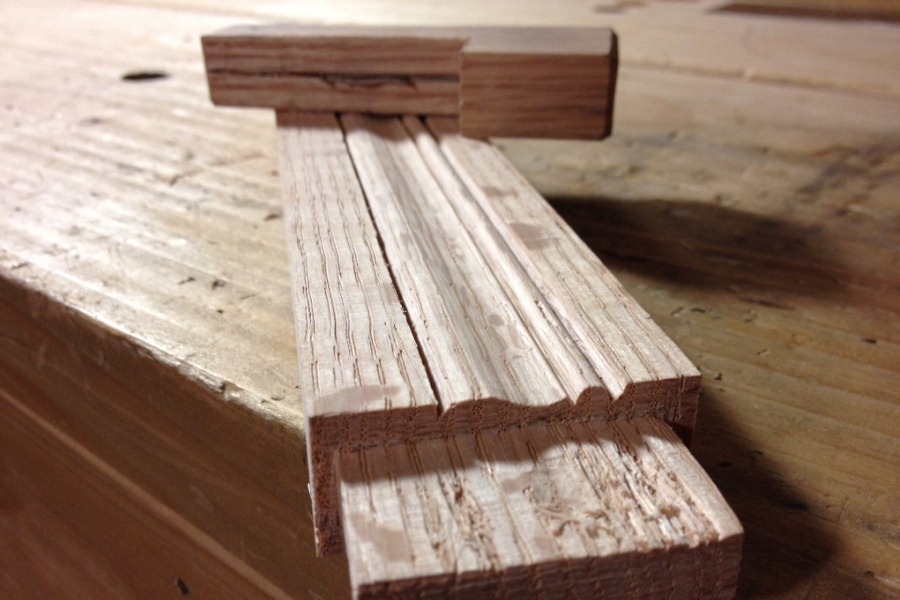
Cut off a section of wood from a scrap board. This was a piece of 1 x 2 red oak. I guess I cut it off about 3″ or so. I didn’t measure, it’s not important.

Cut the wood into an “L” shape. This creates a fence to ride against the edge of the work piece and position the molding cutter in the correct place.

Saw a kerf down the narrower section, stopping at the wide section. You want to saw right up to the wide section, but not into it. If necessary, this kerf can be started with a thin, fine toothed saw and widened with a thicker rip saw.

Drill a pilot hole for a screw completely through the block. Then widen the upper half to create a clearance hole on top. Countersink the upper clearance hole for a flat wood screw.

Hone the flat faces of the scraper on a stone. Don’t worry about the profiled edge. The filed surface is sufficient. Position the scraper in the saw kerf and secure it in place by pinching the kerf together with the wood screw. Here you can see how the extra 5/8″ of scraper helps to set the profile 5/8″ from the fence of the stock and keep it from sliding closer in use.
Now go scratch that molding. Will it take a bit longer than molding planes? Yes. But you’re scraping not planing, so just be patient and enjoy the work as the profile emerges from the wood right before your eyes. The cool thing is, you won’t even need to sand it. Once the profile is cut, it’s finish ready.

2 Comments
Just made one. Thanks for the guide! I believe the length is a bit longer than the 3″ mentioned in the article, more like 5″. Either way works great!
This is a very helpful article. Everyone says “just file a card scraper” but then I had so many questions about how to actually make the profile consistent. This answered all my questions. Thank you!