
Restoring an In-cannel Gouge – Part 2
You can read the previous two posts in this series here and here.
The final step in putting our vintage in-cannel gouge back to work is to re-grind and hone the bevel and back of the cutting edge. This is the part of the process that folks tend to be most anxious about. There always seems to be a fear of ruining the edge. Really, there’s nothing more to fear than there is with any other old chisel. The edge is just curved instead of straight.
However, dealing with the curved edge means that you will need to learn to hone freehand if you aren’t already comfortable doing so. Time to get over it folks. Honing guides are nice, but you simply can’t use them for everything. It’s time to put on the big girl and big boy pants and just do it. After a little practice, and realizing how easy it really is, you’ll kick yourself for putting it off for so long.

Before honing, however, the bevel geometry needs to be addressed. If the current bevel is nice and straight, you may be able to skip this step. However, if you need to re-grind the primary bevel, it helps to blunt the edge first to get it nice and straight. I like the use a coarse diamond stone for blunting the edge. Since the metal at the edge of the bevel is so thin, the process goes very fast with the coarse stone and there is less chance of blunting too much and having to grind off more from the bevel than you really need to. The stone also helps make the edge nice and straight. This can be more challenging on a high speed grinder.

For grinding the bevels on in-cannel gouges and molding plane irons, I highly recommend picking up a 1/4″ wide grinding wheel. They’re only about $20 but they are priceless for grinding into concave curves. You can get them for both 6″ and 8″ grinders, though you may need to make yourself custom bushings for the typical 8″ grinder with a 5/8″ arbor as most of the 1/4″ x 8″ wheels I’ve seen have a 1 1/4″ arbor hole. The 1/4″ x 6″ grinding wheels typically have a 1/2″ arbor hole to fit most 6″ grinders. To use the wheel, take your diamond wheel dressing tool and shape the edge of the wheel to a semicircular profile. Set up thusly, the wheel will be capable of grinding all but the smallest of concave profiled tools.
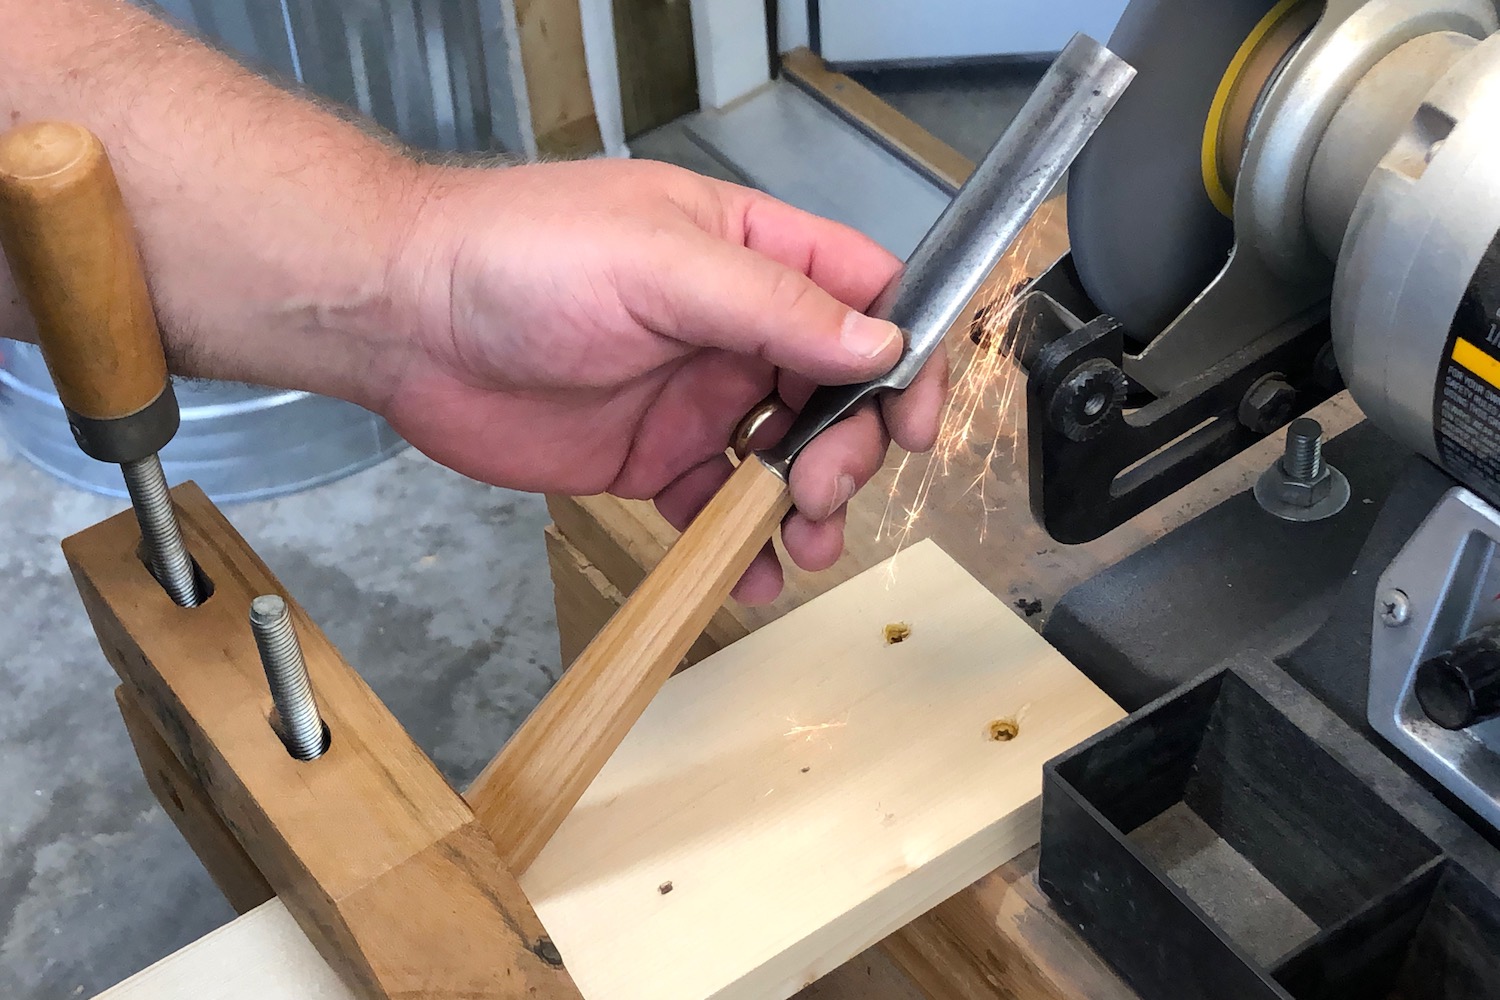
To grind the in-cannel bevel, you need a way to support the tool. The typical flat tool rest that is used for flat chisels and out-cannel gouges won’t work for an in-cannel gouge. You can’t roll an in-cannel gouge on a flat tool rest. If you have a Wolverine style grinding jig for your turning gouges, then you already have everything you need to grind the bevel on the in-cannel gouge. However, if you don’t own a commercial tool rest in this style, you can easily do the same job by screwing a scrap piece of wood in front of your grinding wheel and using a clamp to support the handle of the tool. If you don’t have a clamp, screw another scrap of wood across the first one. The clamp just makes adjusting the position of the gouge on the grinding wheel faster.

If you don’t use a high speed grinder, there are a couple of alternatives for reshaping the tool’s primary bevel. Diamond needle files are one such alternative. You can get them in coarse and fine and they do a pretty good job on hardened tool steel, albeit much slower than a grinder. You can also wrap some wet/dry sandpaper around an appropriately sized dowel. For either of these options, clamp the tool to the workbench with the bevel up and hanging over the edge of the bench. This will allow you to lock the position of your arms and wrists at a consistent angle in order to create a consistent bevel.

After grinding, I like to start polishing the back side of the gouge. To do so, I start with the coarse diamond stone to remove any tarnish and previous scratches. The shape of the back must be kept consistent by not working any one section more than any other. If one area is over worked compared to the rest, the gouge will develop a flat spot rather than maintaining a smooth curve.

The easiest way I’ve found to keep the back curve consistent is to roll the tool as it is being pushed over the stone. I start on one corner and place the gouge on the end of the stone closest to me. Then I push the gouge forward and roll it at the same time, ending on the opposite corner. The motion is a bit awkward at first, but after a couple of minutes you get into a pretty smooth and fluid groove. Continue in this manner until you get a consistent scratch pattern from one corner all the way around the tool to the other.

After the initial work on the back of the tool with the diamond stone, I switch to Arkansas slip stones to hone the bevel. This has to be done freehand, but it’s much easier than it sounds. By holding the tool right in front of your chest, with the bevel facing your opposite hand, you can sight the bevel angle very easily.
Put some oil on the slip and present it to the tool at the same angle as the bevel. Starting at the near corner, put the bottom edge of the slip on the bevel. Holding the tool steady, slide the slip down along its edge at the same time moving it toward the center of the bevel. Stop just shy of the center, lift the stone off the bevel, then repeat the process starting at the far corner. Each time, stop just shy of the center. Most people have a tendency to over work the center of the tool’s bevel, creating a dished edge. Honing this way focusses most of the effort on the outer edges. The center is honed just enough as a result.
Repeat these actions a dozen times or so from each corner until you have raised a small burr on the back edge of the tool. Then chase the burr back to the bevel using either the flat face of the slip stone or a flat bench stone of equivalent grit in a manner similar to using the diamond stone above. I go through this process using a soft Arkansas slip, then I repeat the process using a finer hard Arkansas slip. If you don’t have slips, you can use several grits of wet/dry sandpaper wrapped around a dowel.

The final step after honing is to complete the polish on the back and bevel. I do this with a leather strop charged with honing compound. Stropping the back of the gouge is similar to the motion of the initial stages of polishing on the bench stone, but I pull when using a strop instead of pushing. So starting at one corner, I pull the tool toward me while rolling it to the opposite corner.

The bevel is stropped by pulling it over a piece of charged leather wrapped around an appropriately sized dowel. The process of stropping the back and bevel is repeated about a half dozen times, alternating between back and bevel until any traces of a wire burr are removed. At this point the gouge should be razor sharp and should pare end grain cleaner than any power tool could ever make it.

So I hope this series of posts has encouraged you to pick up a couple of these super useful tools for yourself and maybe taken some of the anxiety out of sharpening them, and putting them back to the work that they were made to do.
Tag:Chisels, Sharpening
