
Body Mechanics for Precision Hand Sawing
In my shop (and likely yours too if you primarily use hand tools in your work as I do), hand saws are king. I use them for crosscutting long boards into more manageable lengths, ripping stock when it would be too long or heavy to put through the bandsaw, sizing project parts, cutting tenons and dovetails, and a host of other tasks. I rely so much on my hand saws that if I had to true every saw cut that I make, I would have to spend at least twice as much time on my projects as I do. For efficiency’s sake, I don’t want to have to shoot every saw cut with a plane or adjust the fit of every dovetail and tenon. So it’s really important that I am able to be very precise with my saw cuts so that I can assemble my joinery right from the saw as much as possible.
While sawing precisely by hand may seem like black magic when you’re first learning, the secret to precision hand sawing, if you can call it that, is starting the cut precisely, and proper body mechanics during the cut. I talked about starting the saw precisely last time. Today, I want to go over the simple body mechanics for making the rest of the cut after successfully starting it.
Fortunately, learning good body mechanics for precise hand sawing isn’t difficult, it just requires a bit of focus to ensure that you position yourself properly, at least until you develop the muscle memory to automatically fall into proper alignment with the desired cut line. If the mechanics of your saw stroke are dialed in, a sharp, high quality saw will almost follow a line on its own. Even a dull, unevenly set, mildly kinked saw will do an admirable job of things if your technique is good. However, you’ll be much less frustrated if your saw is straight, sharp, and evenly set. If your saw isn’t, and you’re not comfortable fixing it yourself, send it to a reputable hand saw doctor to have it tuned up properly.
Once you have a properly sharpened and set saw, decide how you are going to position your work. For breaking down long stock, you have two choices. You can work at the workbench, or you can put the board on a saw bench (or two). If you choose to work at a saw bench, make sure your saw bench is the proper height. There is no such thing as a one size fits all saw bench. The proper height of your saw bench depends upon the length of your legs. Make your saw bench so that the surface of the bench is about knee height. Much lower than knee height will result in the toe of your saw hitting the ground and limit the length of your saw stroke. Much higher than knee height will cause your hips to open up too much and cause back pain.

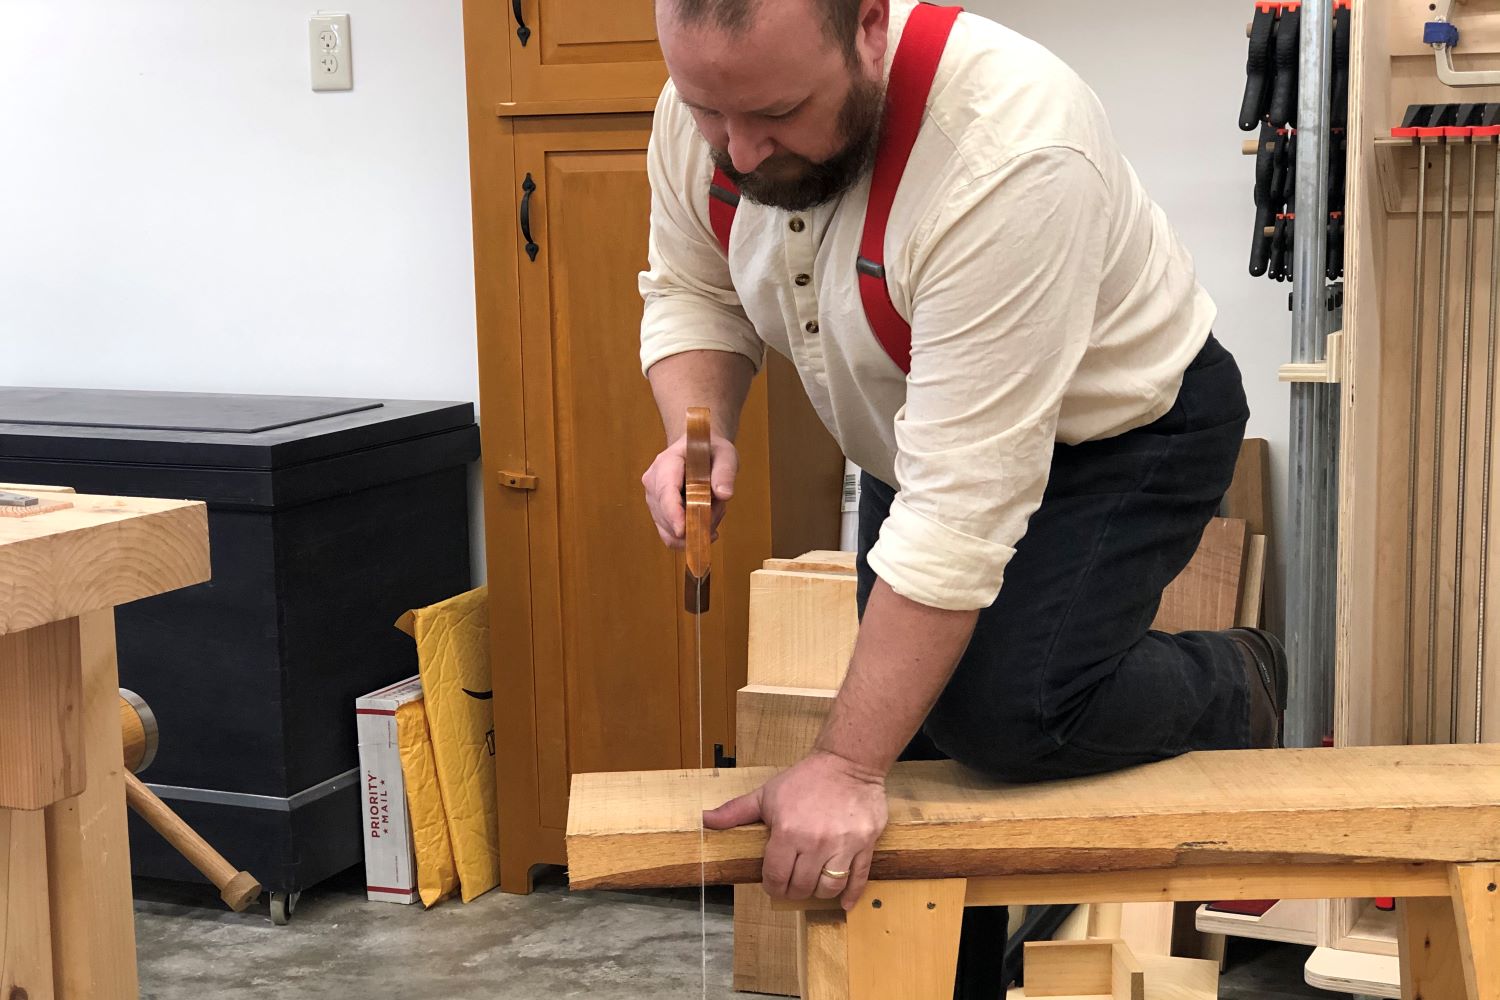
These days, I prefer to work at the workbench as much as possible. I’m getting older and bending over a low bench begins to strain my back if I work that way for too long. However, body position is no different whether working at the saw bench or the workbench. To get into proper position, grip the handle with a three fingered grip, point your index finger at the toe of the saw, and keep the saw, your wrist, elbow, shoulder and right eye (left eye if you saw left handed) in a single plane, aligned with the cut line. Once positioned this way, your arm should move in a straight line within that plane. If you close your left eye (lefties close your right eye) your open eye should see nothing but the back of the saw blade. If you see the side of the blade at all, either you are not positioned properly above the saw and cut line, or the saw is not plumb.
When you are learning to use a hand saw, it can be valuable to focus on getting into proper position before beginning the cut. If you have a tripod or a helper, set up and take a picture of yourself before you start your saw cut. Compare your photo to the ones above. Is your elbow sticking out? Are you standing too far to one side? Is your wrist bent? Any deviation from a single plane with the cut line will cause you to pull the saw to one side or the other and result in a cut that is out of square, out of plumb, or both. So focus on body position until proper alignment becomes second nature.

A great way to practice these sawing mechanics is to make the crosscuts and rips for the secondary parts of your projects, such as drawer sides, bottoms and case backs, using your handsaws. These parts are typically made of softer woods such as pine and poplar, which are easy
to saw. These secondary parts also aren’t typically seen in the finished piece, so mistakes are easily hidden.
Even if you aren’t a hand-tool junkie, sawing with long handsaws once in awhile is the best way to develop the hand-eye coordination and muscle memory needed to become a better sawyer. Practicing good mechanics with longer saws and longer cuts is a skill that directly transfers to your joinery saws, and can help to vastly improve your hand-cut joinery. Who knows, you may even find it kind of fun!
Tag:Hand Sawing

2 Comments
Bob,
This was an interesting presentation but what really intrigued me was your comment about sighting down the saw like a rifle. A number of people are right-handed but left-eye dominant and vice versa. This makes shooting a firearm difficult. I imagine it might also make sawing difficult as well. I can’t comment on that because I’m right-handed and right-eye dominant. Furthermore, I learned to saw just by “doing it a lot” with no one to share with me techniques to become more efficient faster. However, if someone follows your method and still has trouble they should probably check that their dominant eye is the same as their dominant hand. Google it and you can find out how to test.
Thanks for all that you share – I learned something watching your previous video about starting a saw cut. Thanks for sharing this information!
Thanks Duane. In this case though, eye dominance should not play a factor because when sawing we are not “sighting” a distant target. For a right handed sawyer, aligning the right eye above the saw just helps to see that the saw blade is plumb. Of course we should be sawing with both eyes open ????.