• Home
  • Blog
    • Audio Podcast Archive
    • Joinery
    • News & Ramblings
    • Projects
    • Q & A
    • Shop Tips
    • Tools
  • Free Videos
  • Online Courses
  • Traditional Classes
    • Foundations of Traditional Woodworking
RegisterLogin
Bob Rozaieski Fine Woodworking
  • Home
  • Blog
    • Audio Podcast Archive
    • Joinery
    • News & Ramblings
    • Projects
    • Q & A
    • Shop Tips
    • Tools
  • Free Videos
  • Online Courses
  • Traditional Classes
    • Foundations of Traditional Woodworking

Tools

Panel Gauges

  • Posted by Bob Rozaieski
  • Categories Tools
  • Date March 12, 2018
  • Comments 6 comments
Panel Gauge

So far, I’ve talked about traditional marking gauges,  mortise gauges, and cutting gauges. The last of the gauges is the biggest one of all. These are the panel gauges. As their name implies, they are used for marking wide boards and panels.

Panel Gauge
The panel gauge has a rabbet planed into its fence to better register it on the edge of the board or panel being marked. My panel gauge also has both a knife and a pencil for marking.

The traditional marking gauge typically has a beam of about 6″ to 8″ long. That’s because it is designed for marking short distances. So the marking gauge handles tasks like marking dovetail baselines, rabbets, stock thickness, and stock width for narrow components like small drawer sides and door frame parts. If you need to make a mark parallel to the edge of a board up to about 5 or 6 inches from the edge, then a standard marking gauge is the tool of choice.

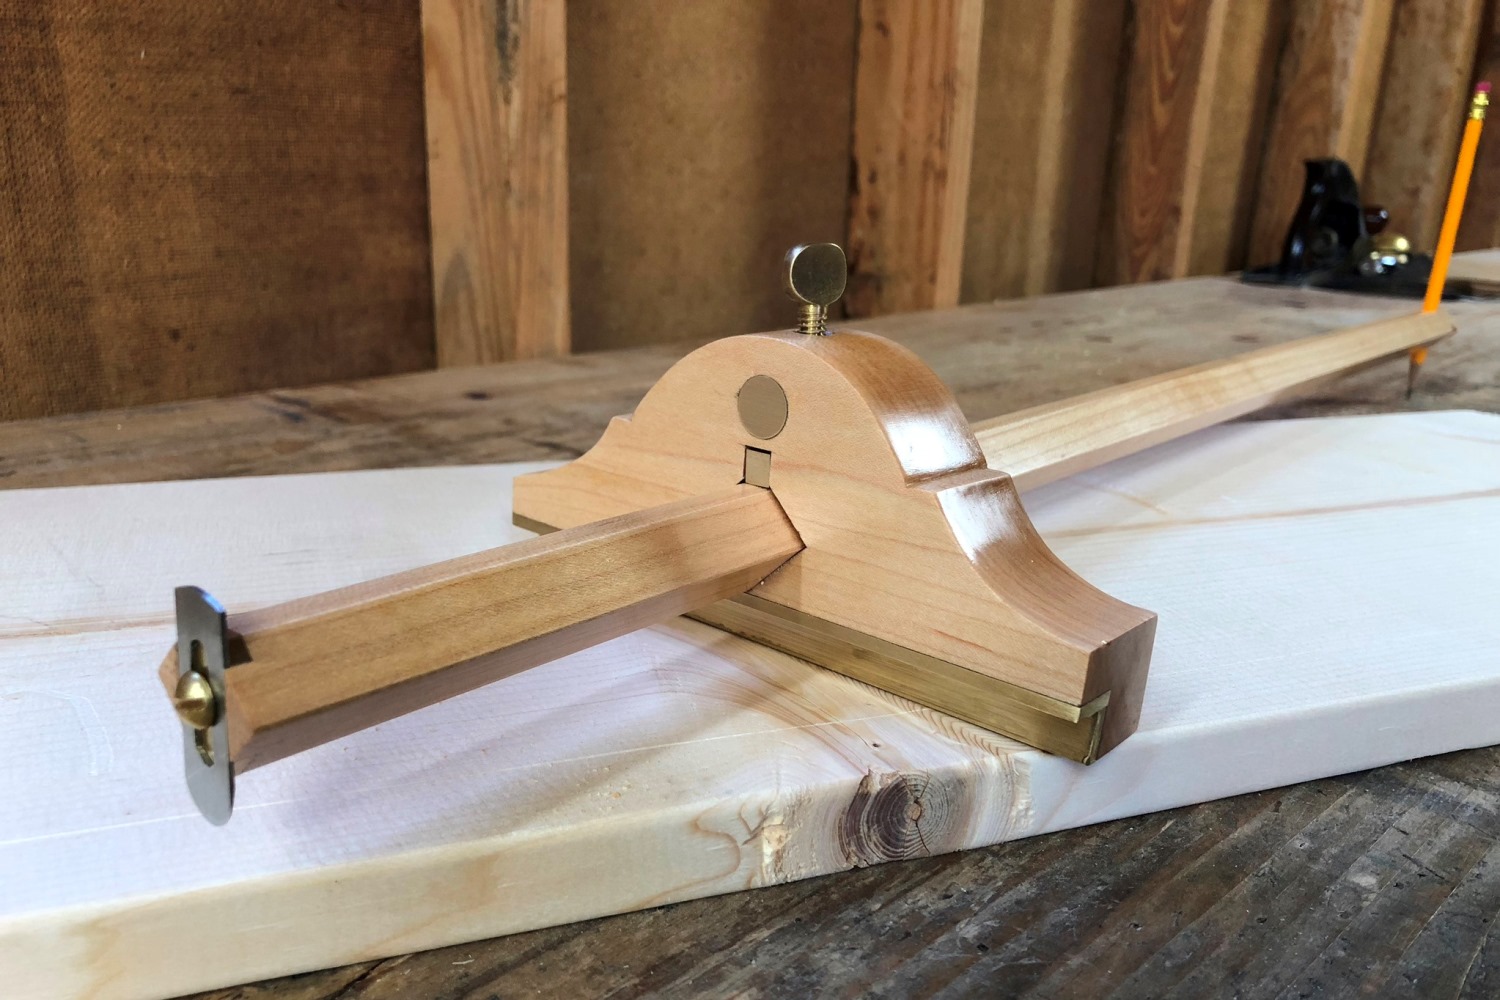
However, when you need to mark wide surfaces, you trade your marking gauge in for a panel gauge. A panel gauge is basically like a marking gauge on steroids. The beam is longer, typically up to about 28″ long, making it capable of marking the width of all but the widest case sides and table tops. The beam is also thicker to better resist flexing when extended out far from the fence. The fence is also thicker and wider than a standard marking gauge in order to provide more reference on the edge of the board. The fence of a panel gauge also typically has a rabbet cut into its inside corner to allow it to sit over the corner of the board being marked. This provides for real solid registration when marking a wide board or panel.

Panel Gauge
While the panel gauge can be used one handed for boards up to about 8-10″ wide, marking really wide stuff usually requires securing the panel to the workbench and marking with two hands.

Panel gauges can be made with either a pin or a knife for the marking implement. Most will also accommodate a pencil on the opposite end of the beam. All three work well with the right touch, but panel gauges are really two handed tools. You can use them single handed, but it’s usually a frustrating affair. I find it best to put the work on the bench top and use two hands on the gauge.

Panel Gauge
Working against a pair of stops makes the panel gauge easier to use two handed.

I prefer to brace the panel or board being marked against two stops. I typically use the planing stop to restrict movement parallel to the grain and a central stop between the boards of my bench top to keep the board from sliding laterally. Then both of my hands are free to control the panel gauge. I press the fence into the edge of the panel, which is restrained by the central planing stop. Then I make the mark toward the planing stop.

There’s no more efficient way to mark the width of a wide board or panel than with a panel gauge. If you rip your stock with a hand saw or a band saw, a panel gauge is an invaluable tool, especially when you need to mark multiple boards or panels to a consistent width.

Want to see how I made the panel gauge in the photos above? Look for my article in the August 2018 issue of Popular Woodworking Magazine.

Share this:

  • Click to email this to a friend (Opens in new window)
  • Click to print (Opens in new window)
  • Click to share on Facebook (Opens in new window)
  • Click to share on Twitter (Opens in new window)
  • Click to share on LinkedIn (Opens in new window)
  • Click to share on Pinterest (Opens in new window)
  • Click to share on Tumblr (Opens in new window)
  • Click to share on Reddit (Opens in new window)

Tag:Gauges

author avatar
Bob Rozaieski

I'm a passionate woodworking enthusiast of over 30 years, with an interest in the methods of pre-industrial joiners and cabinetmakers. I'm a furniture maker, teacher, and author, and I share my thoughts and experiences with the goal of educating and inspiring others who are pursuing the craft of traditional woodworking. In addition to writing about and teaching traditional woodworking, I also build commission pieces for customers, and speak at woodworking shows and seminars.

Previous post

HTT021 - Working In A Small Shop
March 12, 2018

Next post

HTT022 - Improving you Hand Sawing
March 22, 2018

    6 Comments

  1. ikustwood
    April 13, 2018
    Reply

    You mean that you will have a building explanation with only hand tools in PW of August ? Thx!

    • Bob Rozaieski
      April 13, 2018
      Reply

      Yep, exactly!

  2. ikustwood
    April 13, 2018
    Reply

    Thank you ! Will find it and buy it. I just discovered you with the podcast of Tenon & Mortises (Joshua Klein and Mike).

  3. ikustwood
    April 13, 2018
    Reply

    Last question… I looked for your matching planing video … couldn’t find it.

    • Bob Rozaieski
      April 13, 2018
      Reply

      You can find it on my YouTube channel. Here you go https://youtu.be/JZAaCaOJhkg.

  4. ikustwood
    April 13, 2018
    Reply

    Thank you so much! I have so much problem doing the edges that I thought of buying th LN edge jointer (the old Stanley). Cheers !

Join the Discussion Cancel reply

This site uses Akismet to reduce spam. Learn how your comment data is processed.

Subscribe!Get Notified Whenever We Publish New Content

Would you like to receive notifications when new content is added to the site? Just enter your email address below and click "Subscribe" to get on the notification list. Don't worry, we'll never share your email with anyone. It'll be our little secret!

Search

Categories

  • Audio
  • Joinery
  • News & Ramblings
  • Projects
  • Q & A
  • Shop Tips
  • Tools
  • Videos

Latest Online Courses

Hand Plane Foundations

Hand Plane Foundations

Coming soon
Hand Saw Foundations

Hand Saw Foundations

$ 50.00
Colonial Wall Cupboard

Colonial Wall Cupboard

Coming soon

About

  • About
  • Testimonials

Links

  • Email
  • Instagram
  • YouTube
  • RSS Feed

Information

  • Disclaimer
  • Privacy Policy

Support

  • FAQs
  • Contact

Copyright © 2015-2021 Bob Rozaieski Fine Woodworking

Privacy & Cookies: This site uses cookies. By continuing to use this website, you agree to their use.
To find out more, including how to control cookies, see here: Cookie Policy

Login with your site account

Lost your password?

Not a member yet? Register now

Register a new account

Are you a member? Login now

loading Cancel
Post was not sent - check your email addresses!
Email check failed, please try again
Sorry, your blog cannot share posts by email.